skemyOpen Skemy ↗
YOUR WORKSPACE FOR SYSTEM DESIGN

Every connection.
One shared project.

From the schematic to the rack, down to the last cable.
Design in the office, review on a tablet and collaborate with technicians on site. All in the same project.

Web · macOS and Windows preview · 0.99.3 RC · Optimised for tablets

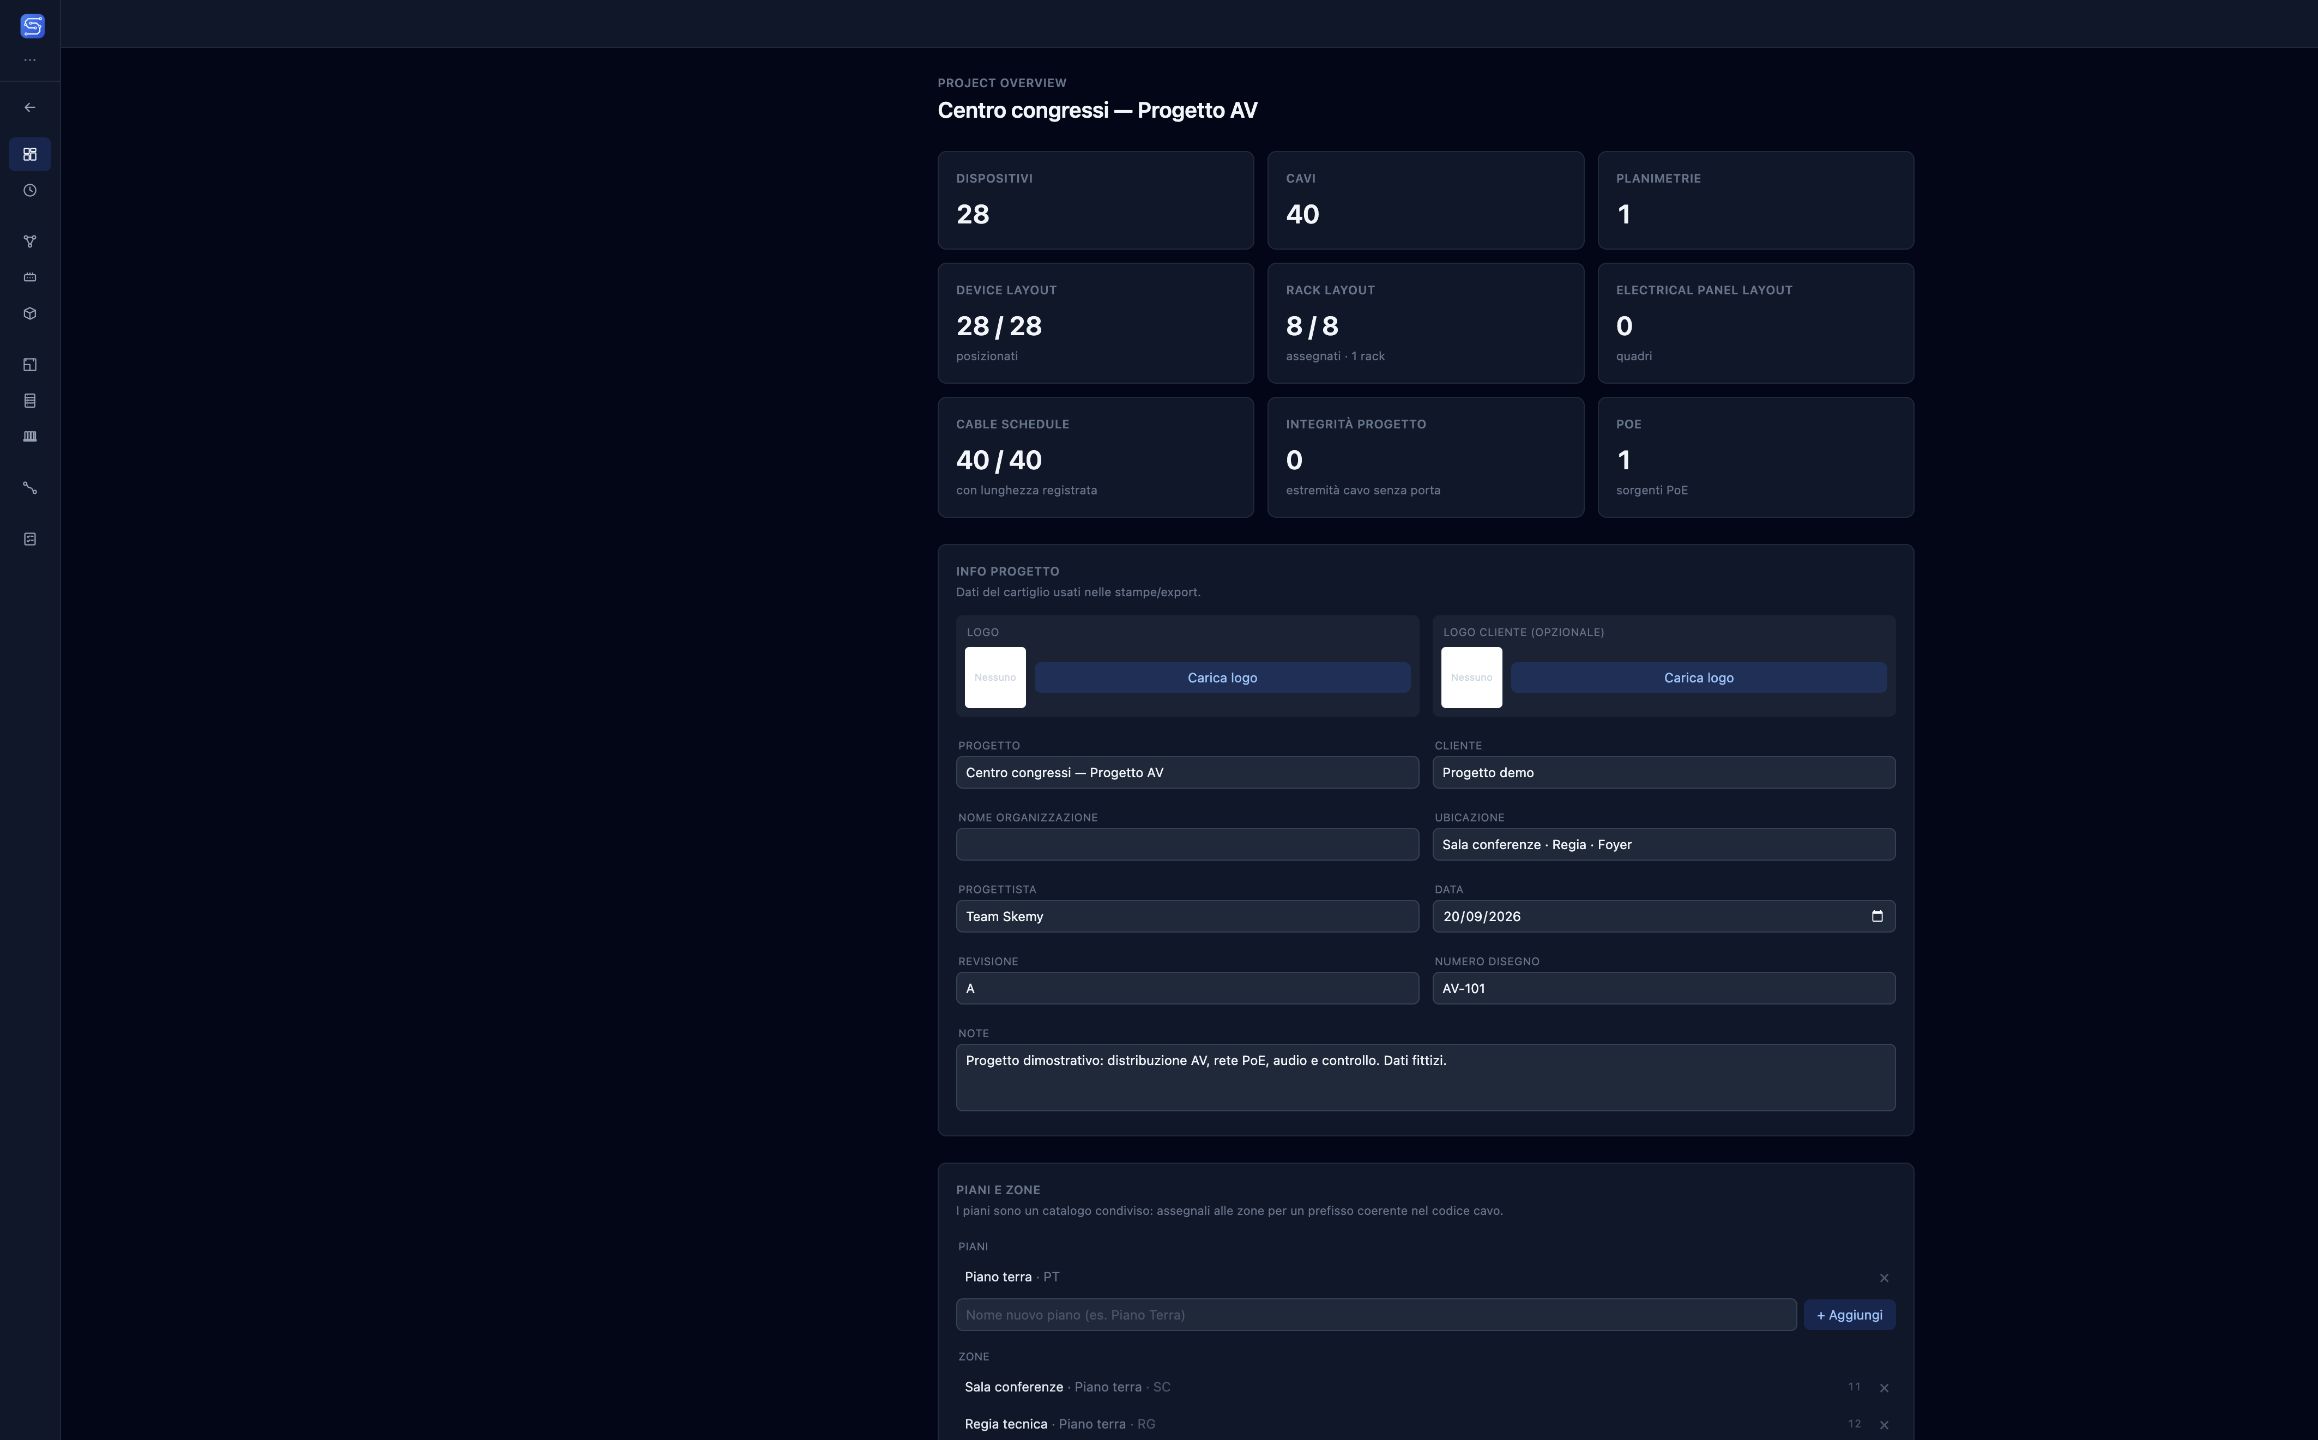
Project Overview
Project Overview: dark theme
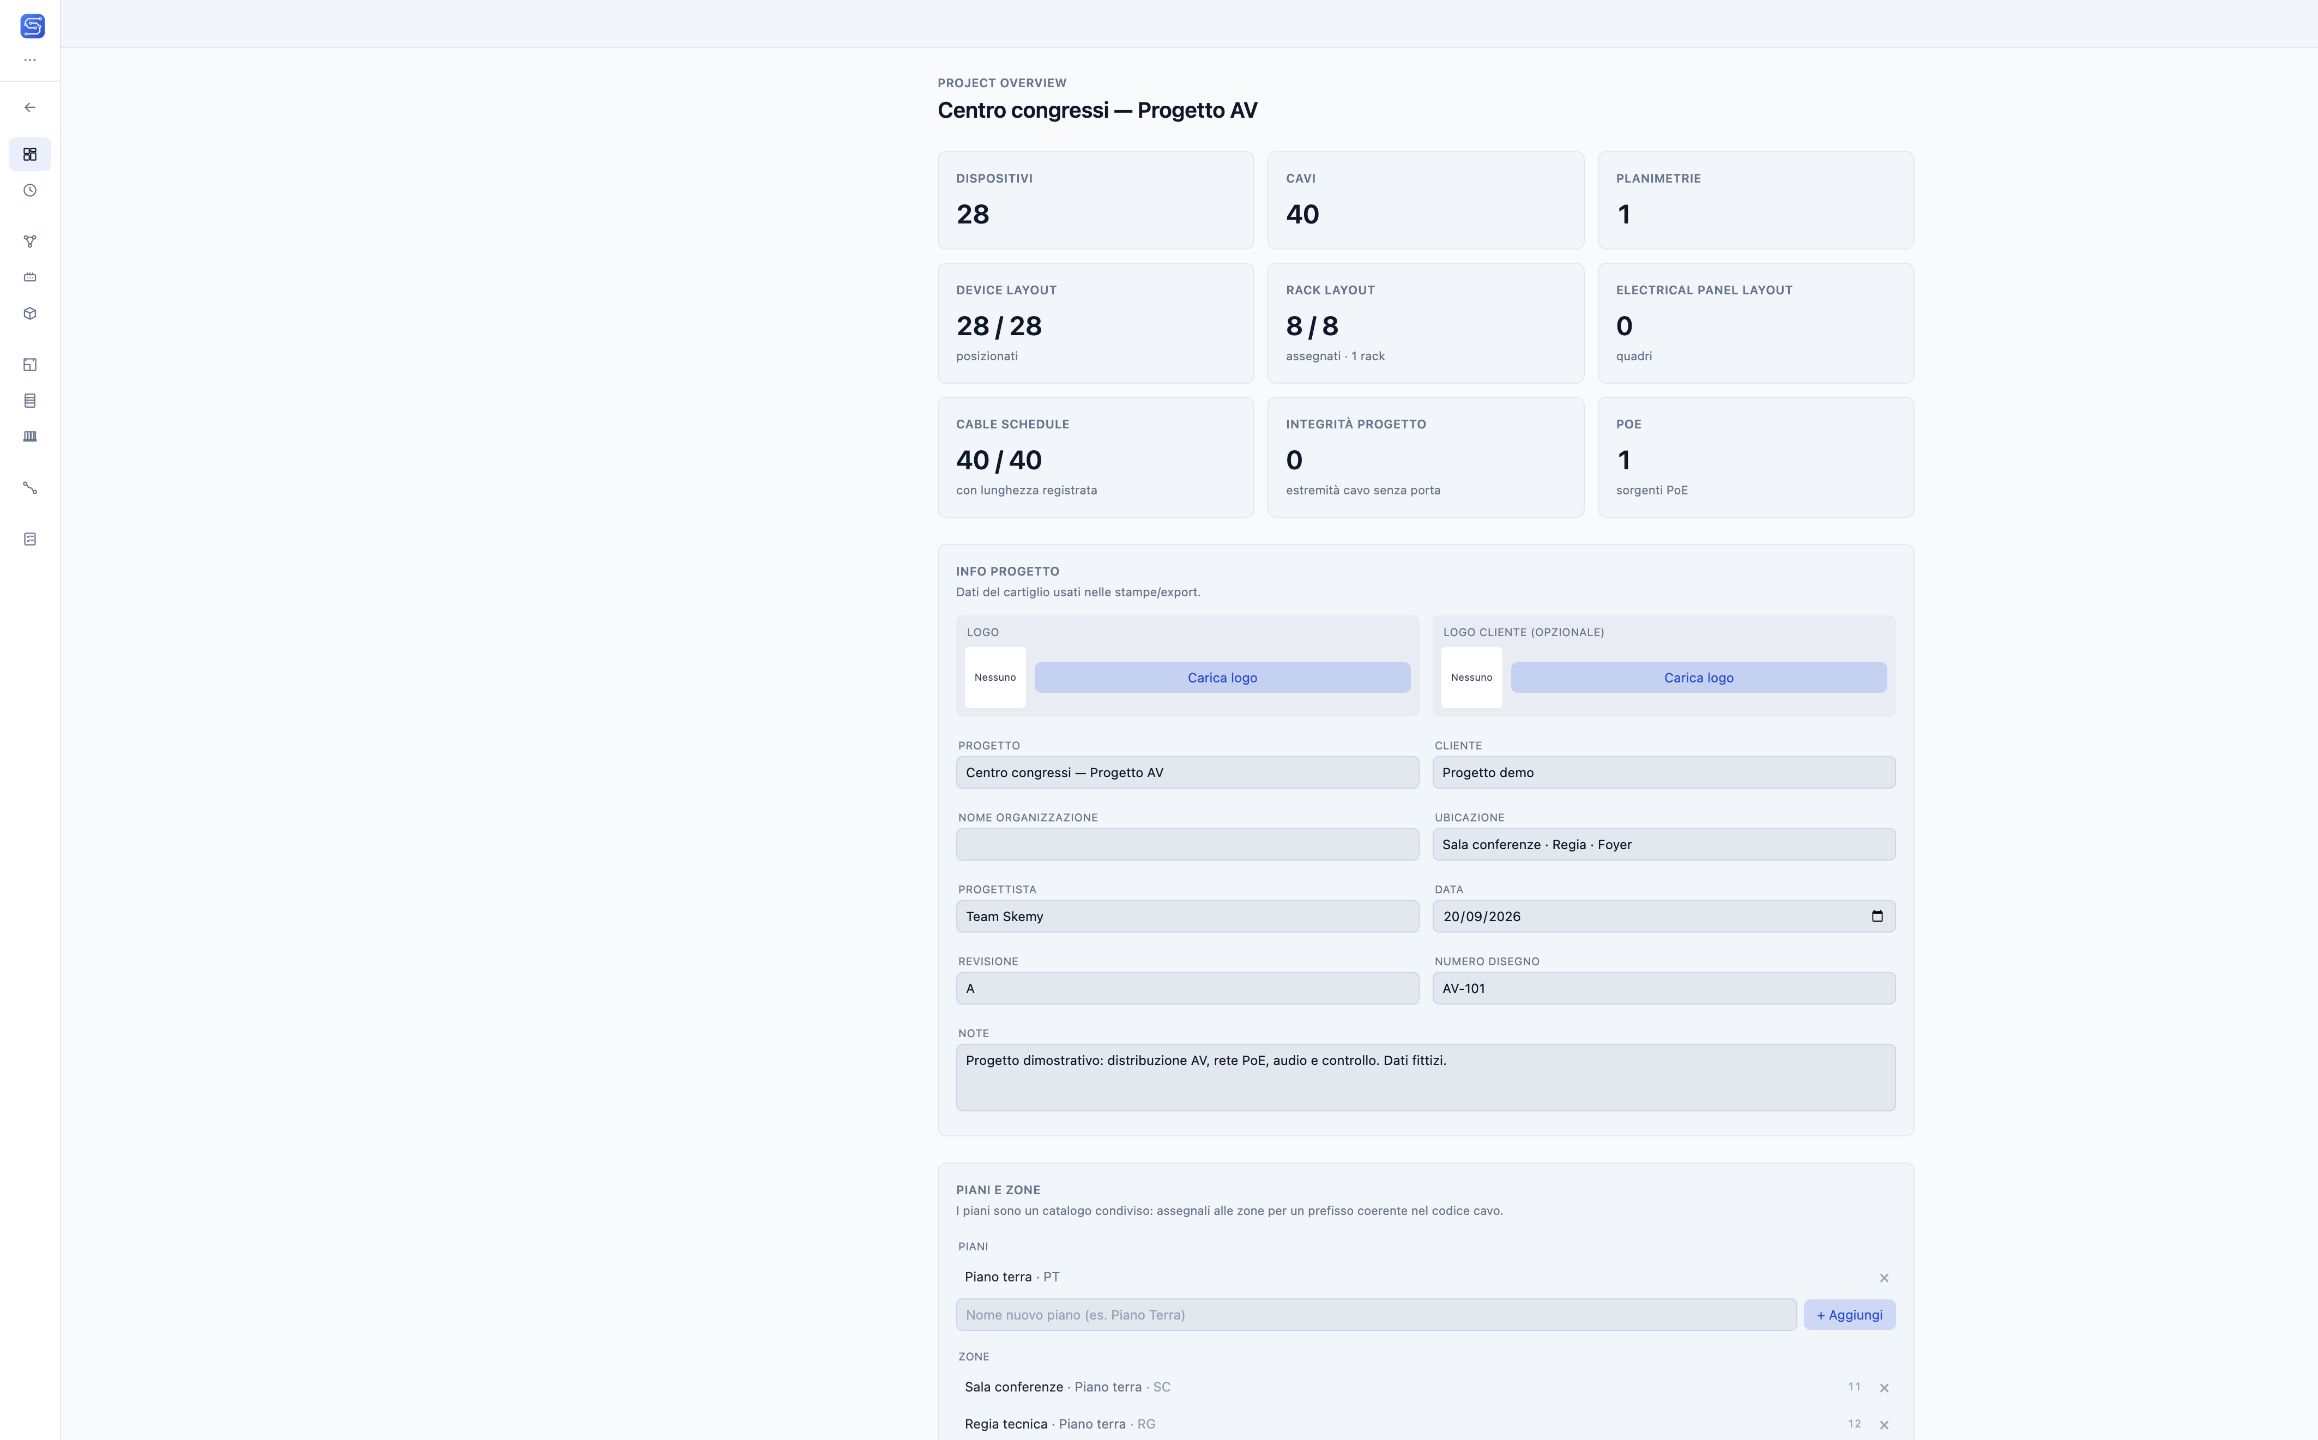
Project Overview: light theme
LIGHTDARK
Actual screenshots · Conference centre demo · Drag the divider · App shown in Italian
AUDIO / VIDEONETWORKSHOME AUTOMATIONSYSTEMS INTEGRATION
ONE PROJECT, MANY PERSPECTIVES

From concept to installation.
Follow every connection.

Explore one fictional AV project: a conference room, control room and foyer. Compare the light and dark themes using the divider. All images come from the public demo, shown with Italian interface labels.

28devices in the demo
40AV and network connections
3connected spaces
2themes, the same precision
SYSTEM SCHEMATIC

Design AV schematics people can follow.

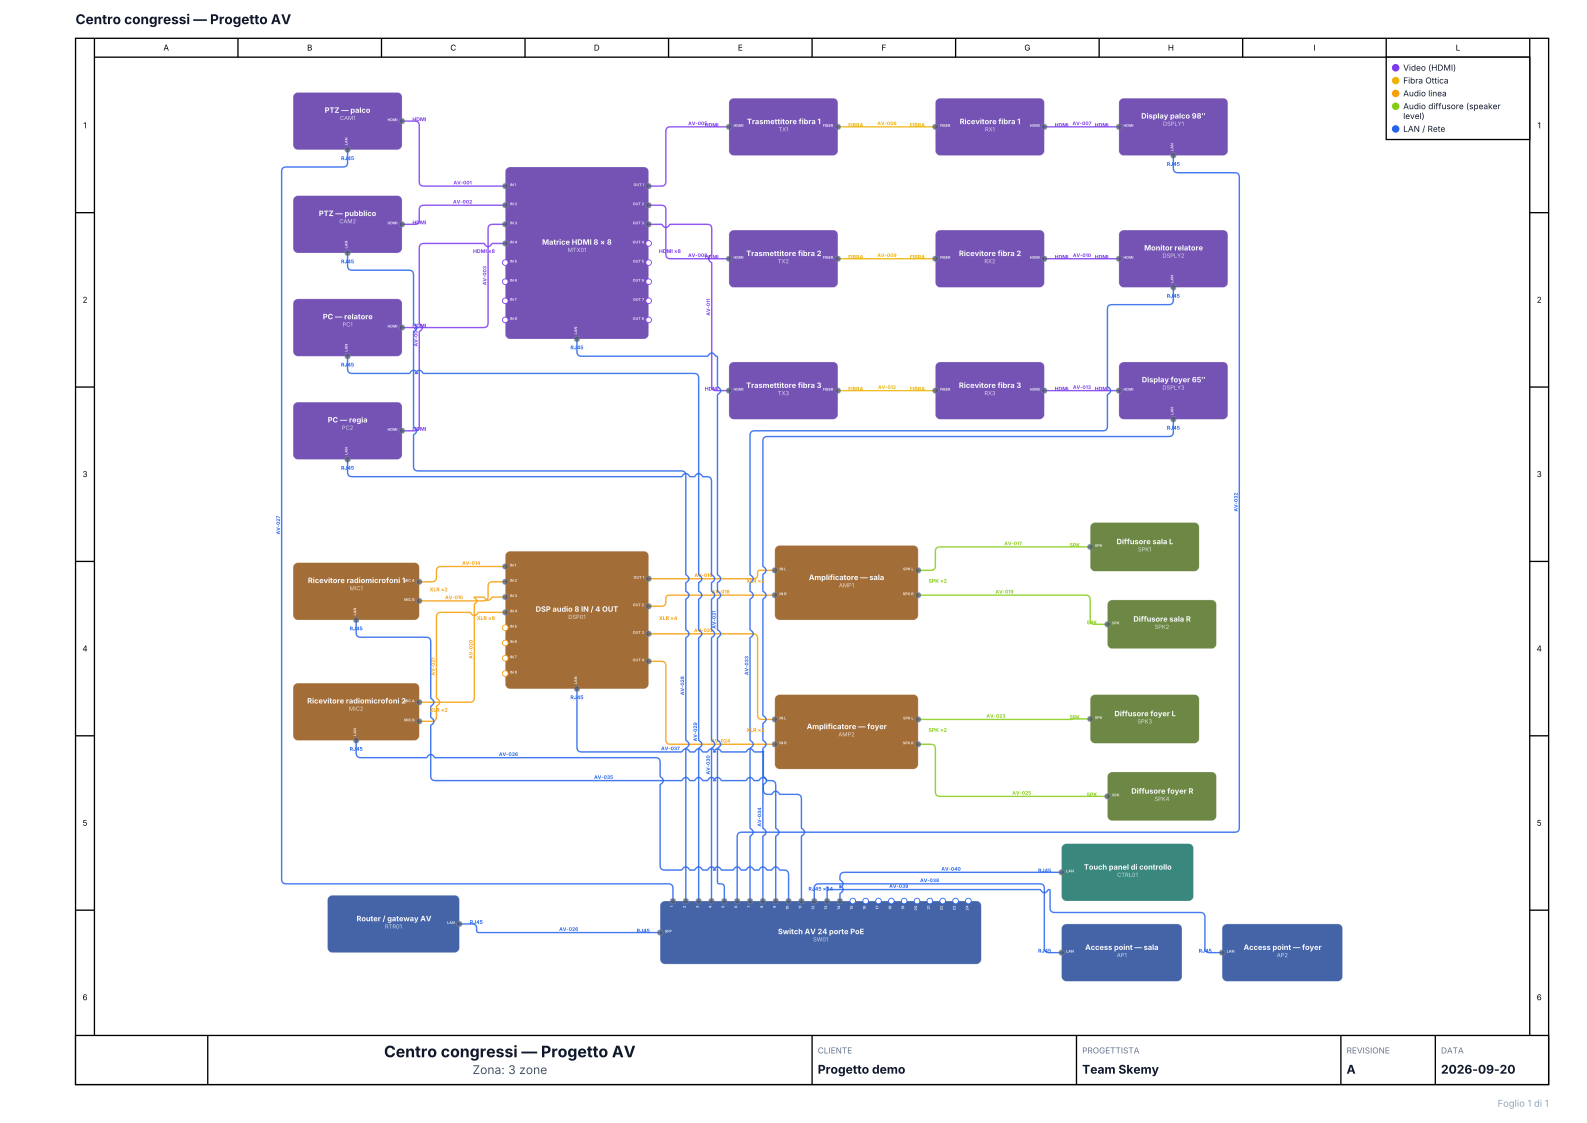
Design AV schematics with devices, ports and connections. Organise HDMI, fibre, audio and network signals and prepare system documentation.

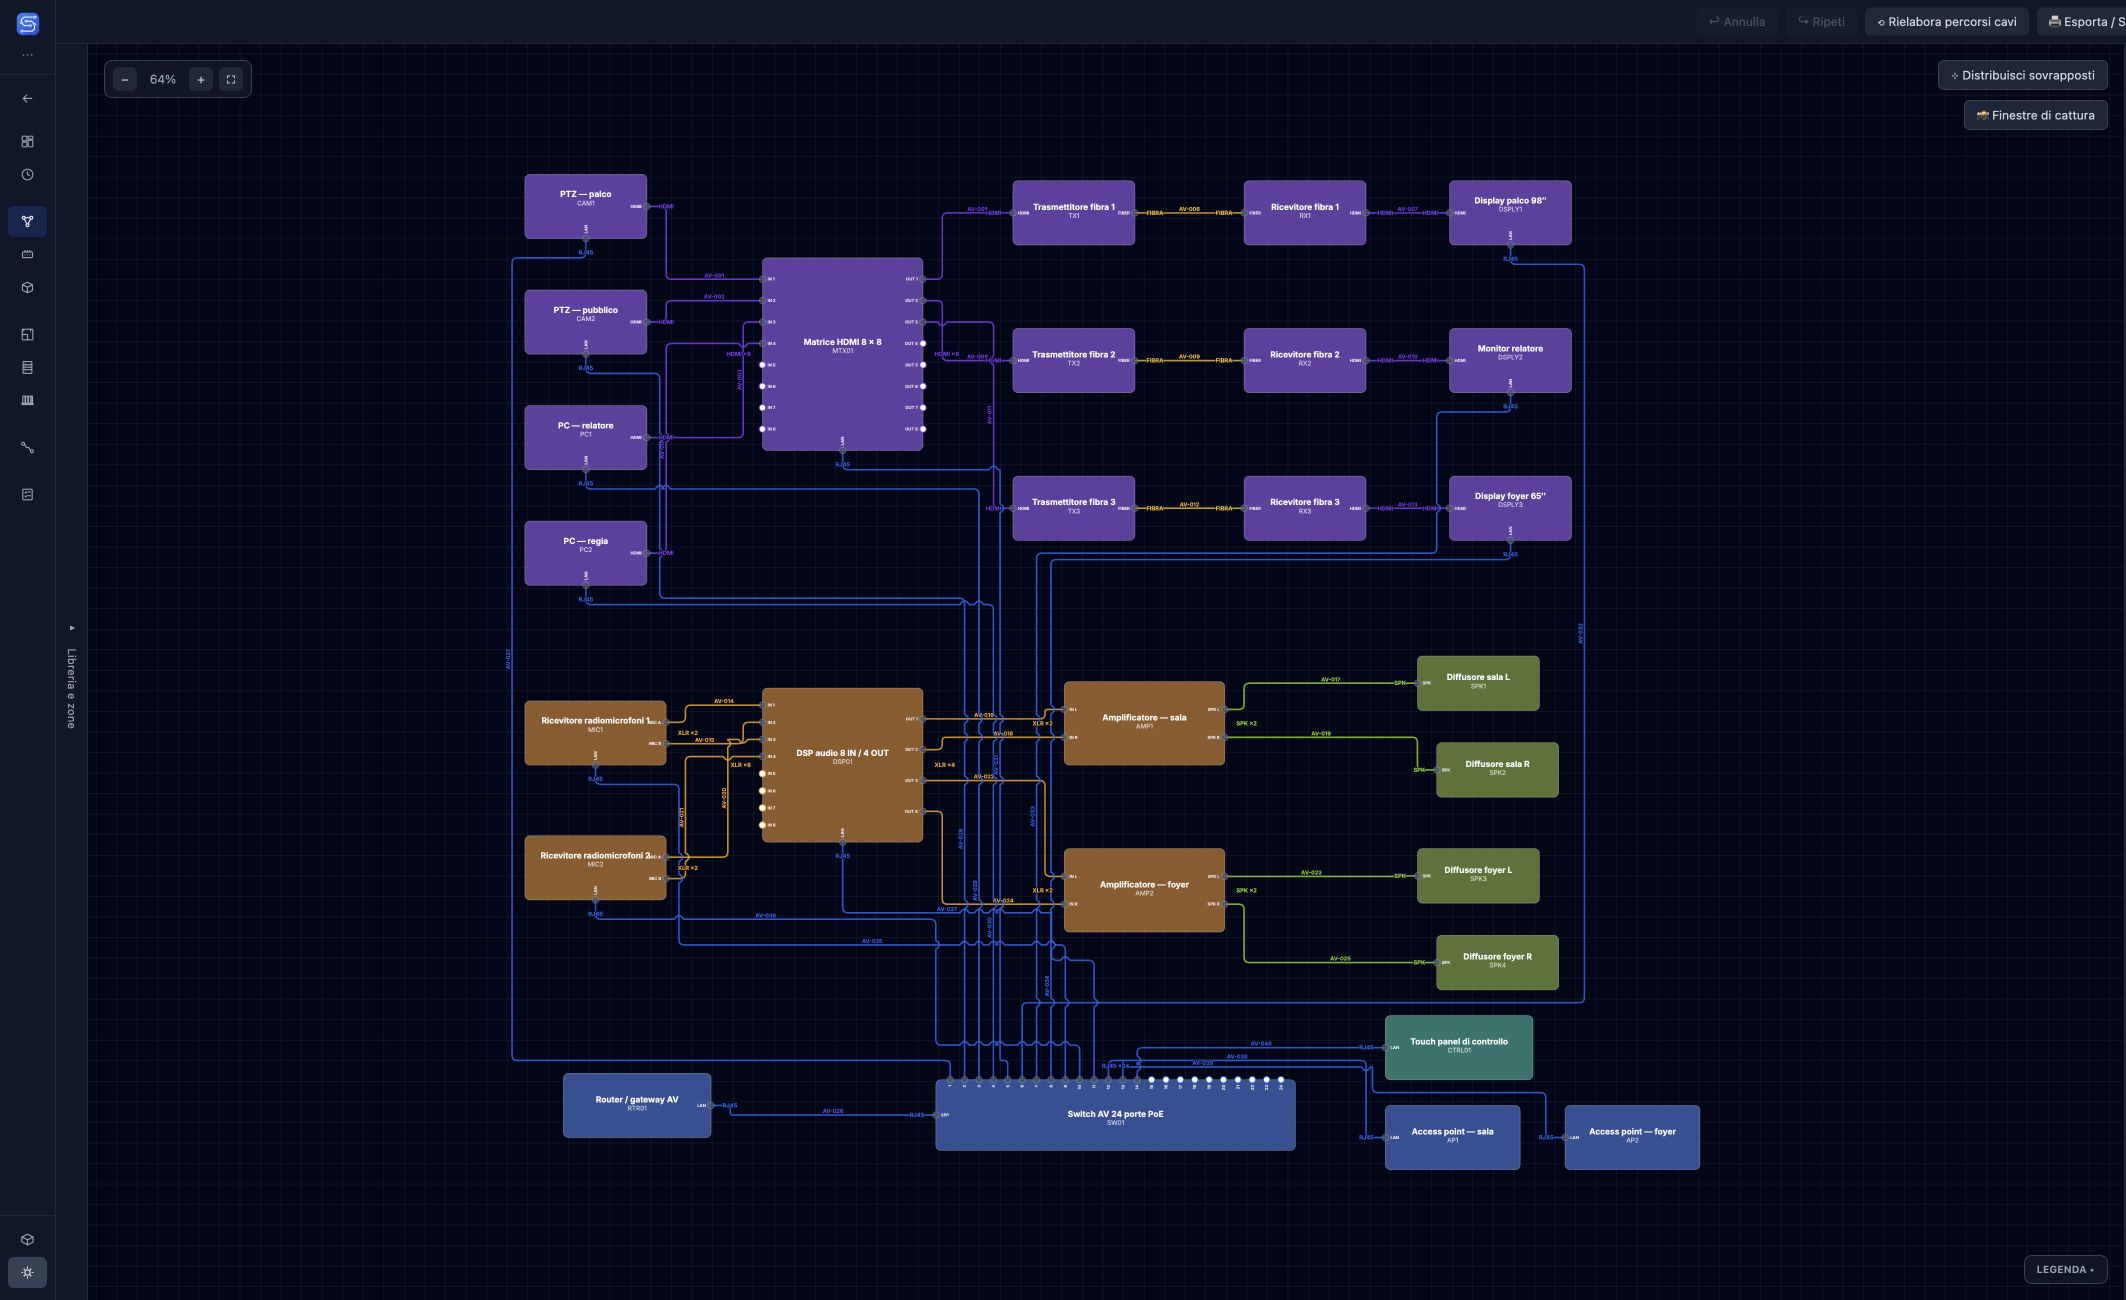
System Schematic
System Schematic: dark theme
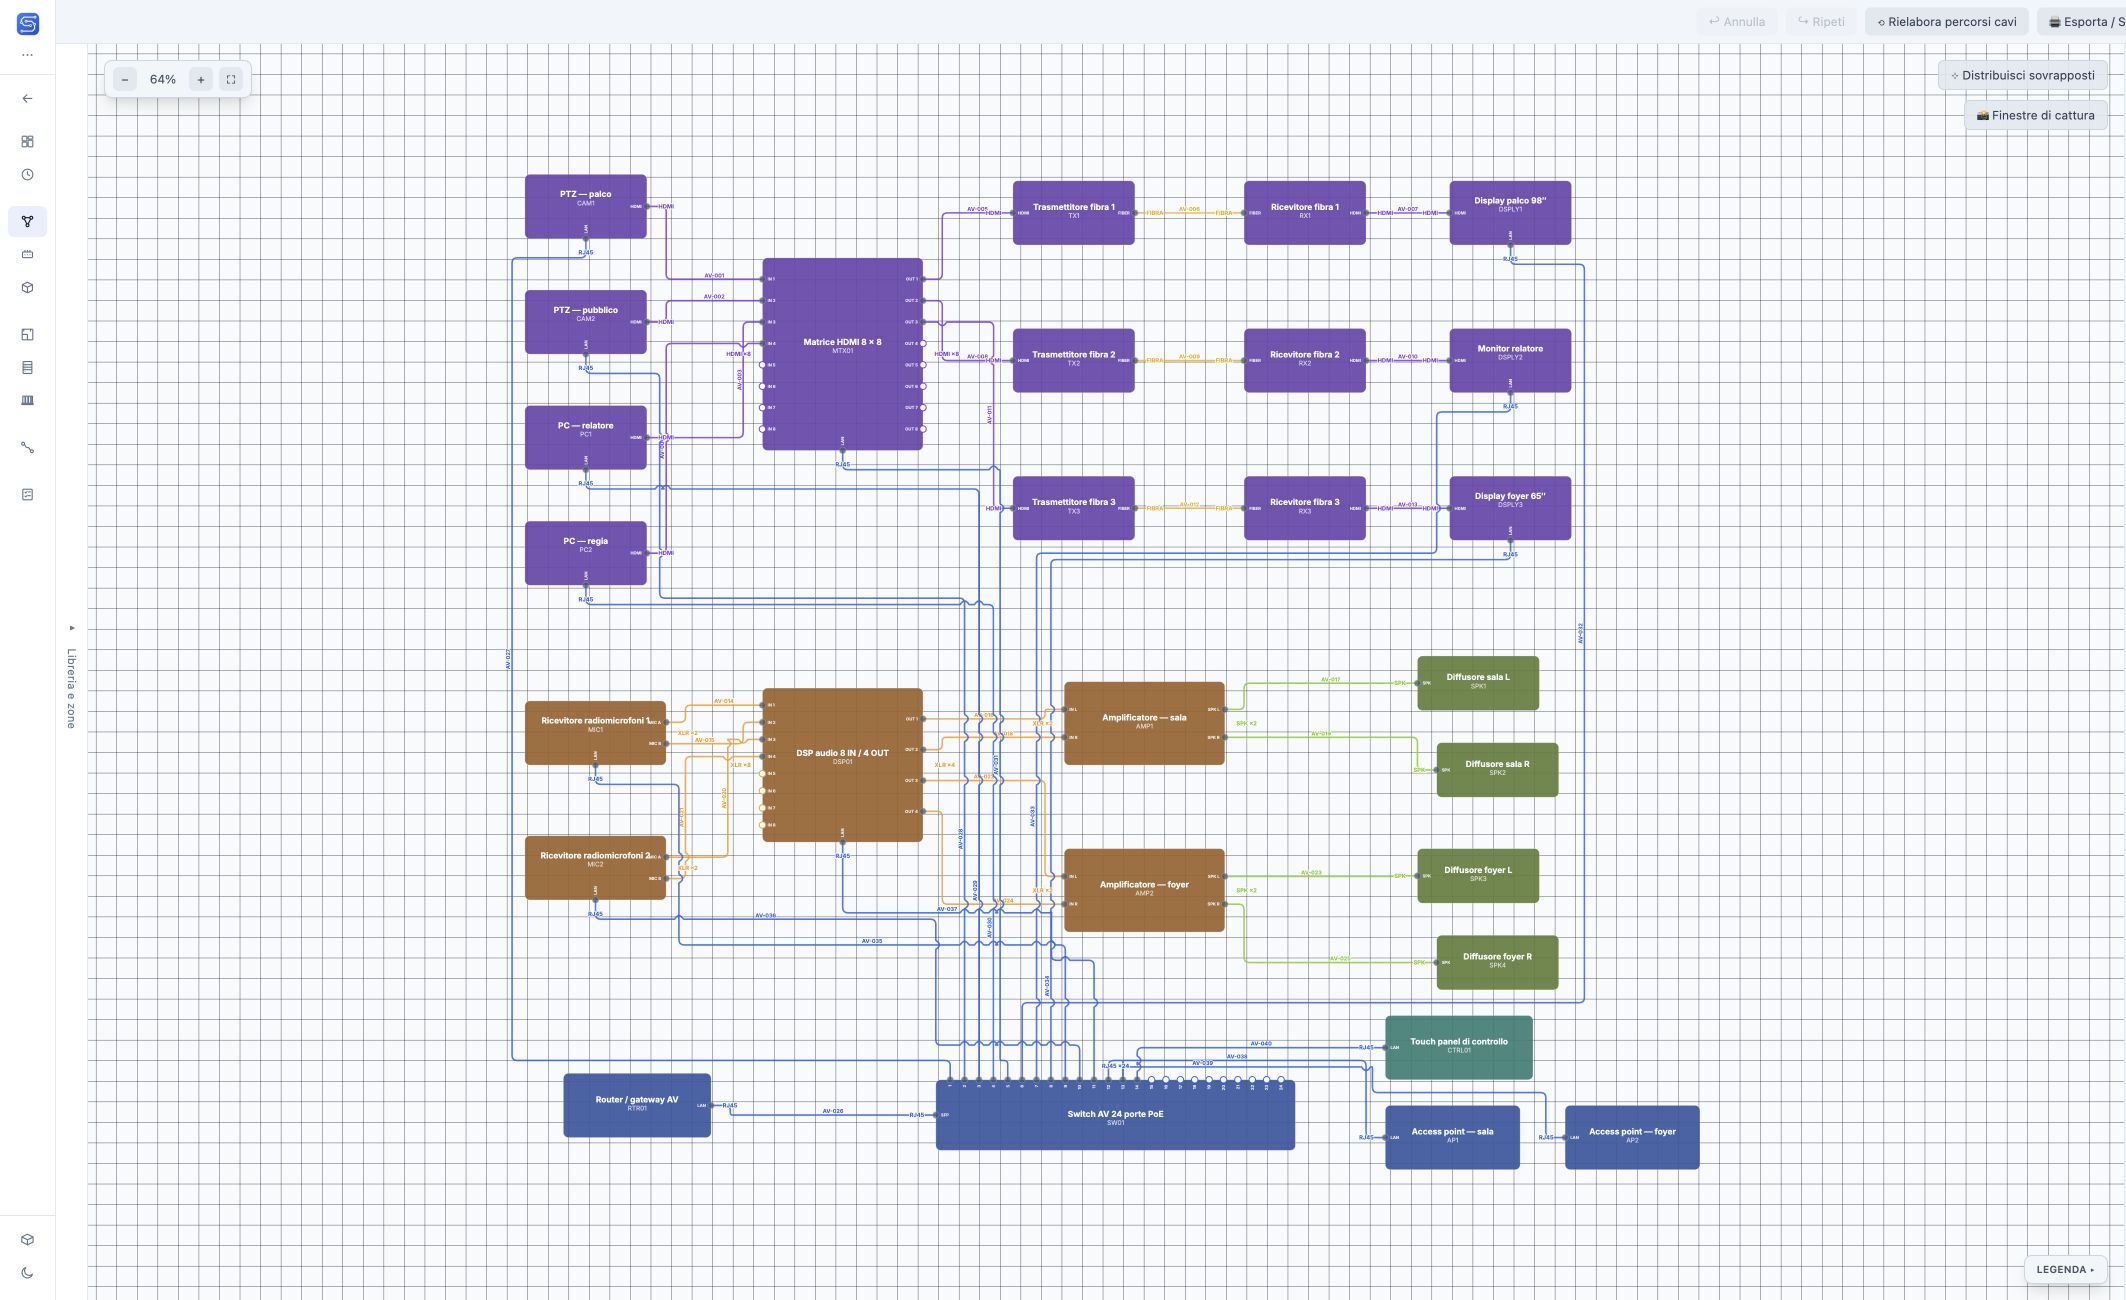
System Schematic: light theme
LIGHTDARK
Actual screenshots · Conference centre demo · Drag the divider · App shown in Italian

From sources to destinations

An AV system brings together signal sources, processing and distribution. In System Schematic, connect device ports to describe these relationships: a camera to a matrix switcher, a fibre transmitter to a receiver, or a DSP to amplifiers. Each connection keeps its signal type and cable identifier.

Keep a growing project organised

Floors and zones help you select the spaces to display. The schematic arrangement describes how the system works; the floor plan describes where devices are physically installed. Work on both without mixing the two arrangements.

From the schematic to the cable schedule

Connections feed the Cable Schedule, where you can review sources, destinations, ports and operational status. Check the connections before handover and prepare the drawings. Vector parts of exported drawings stay sharp when enlarged.

Explore System Schematic →
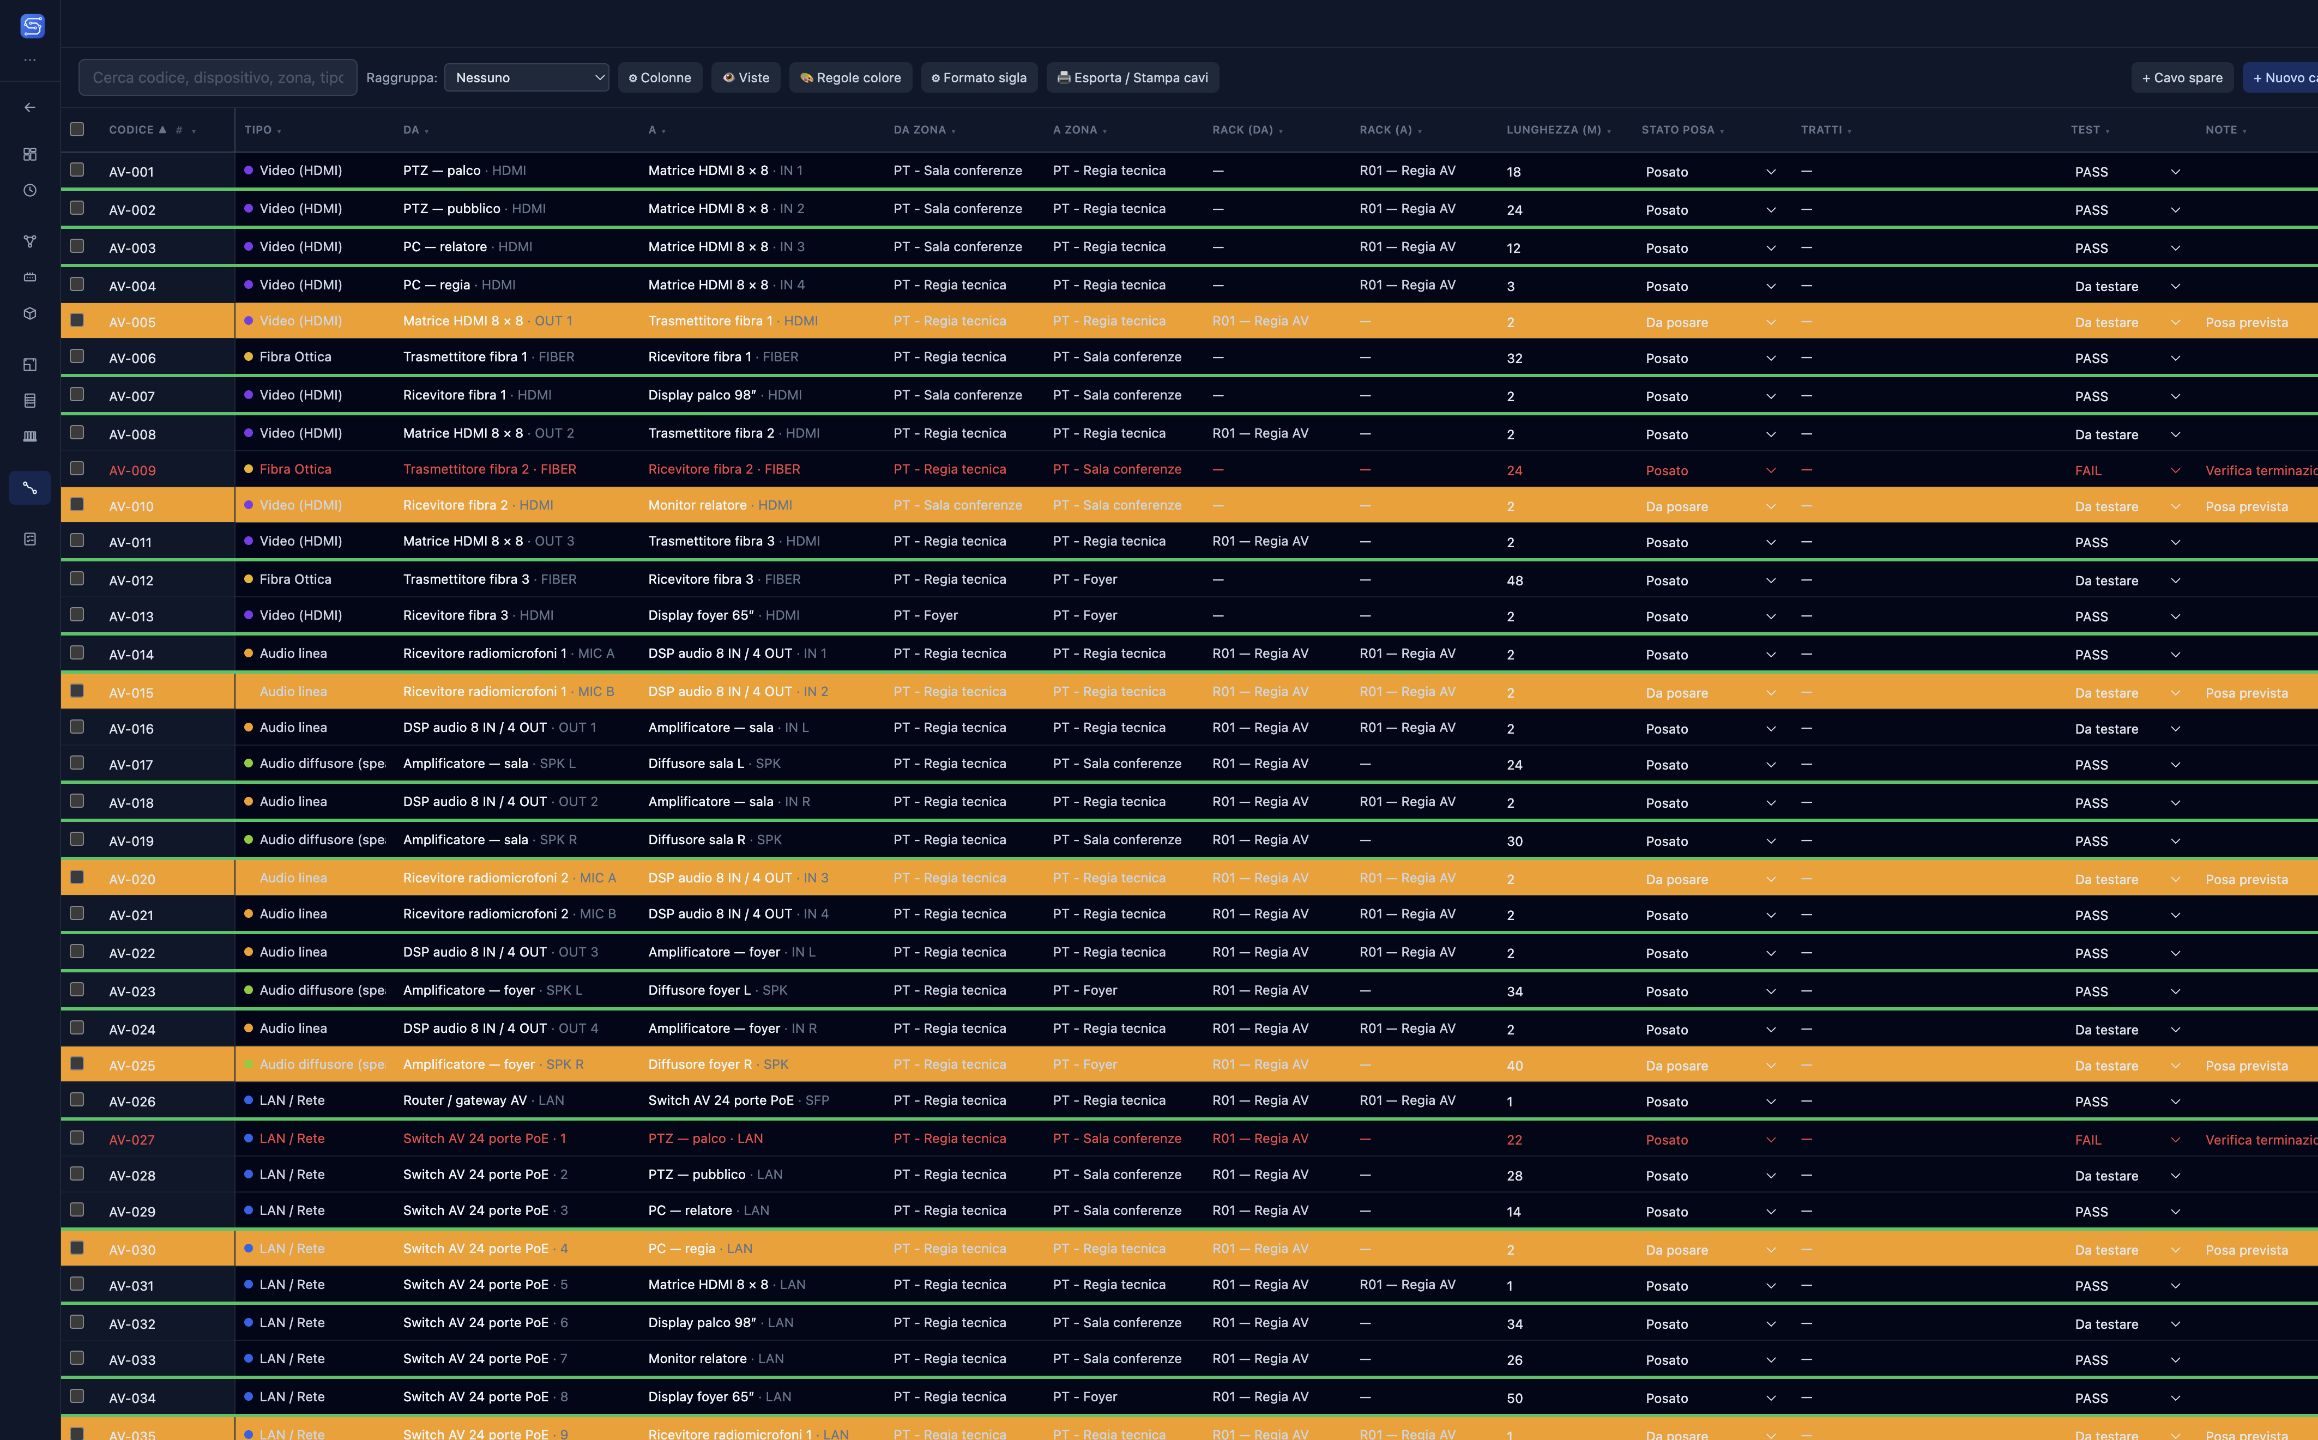
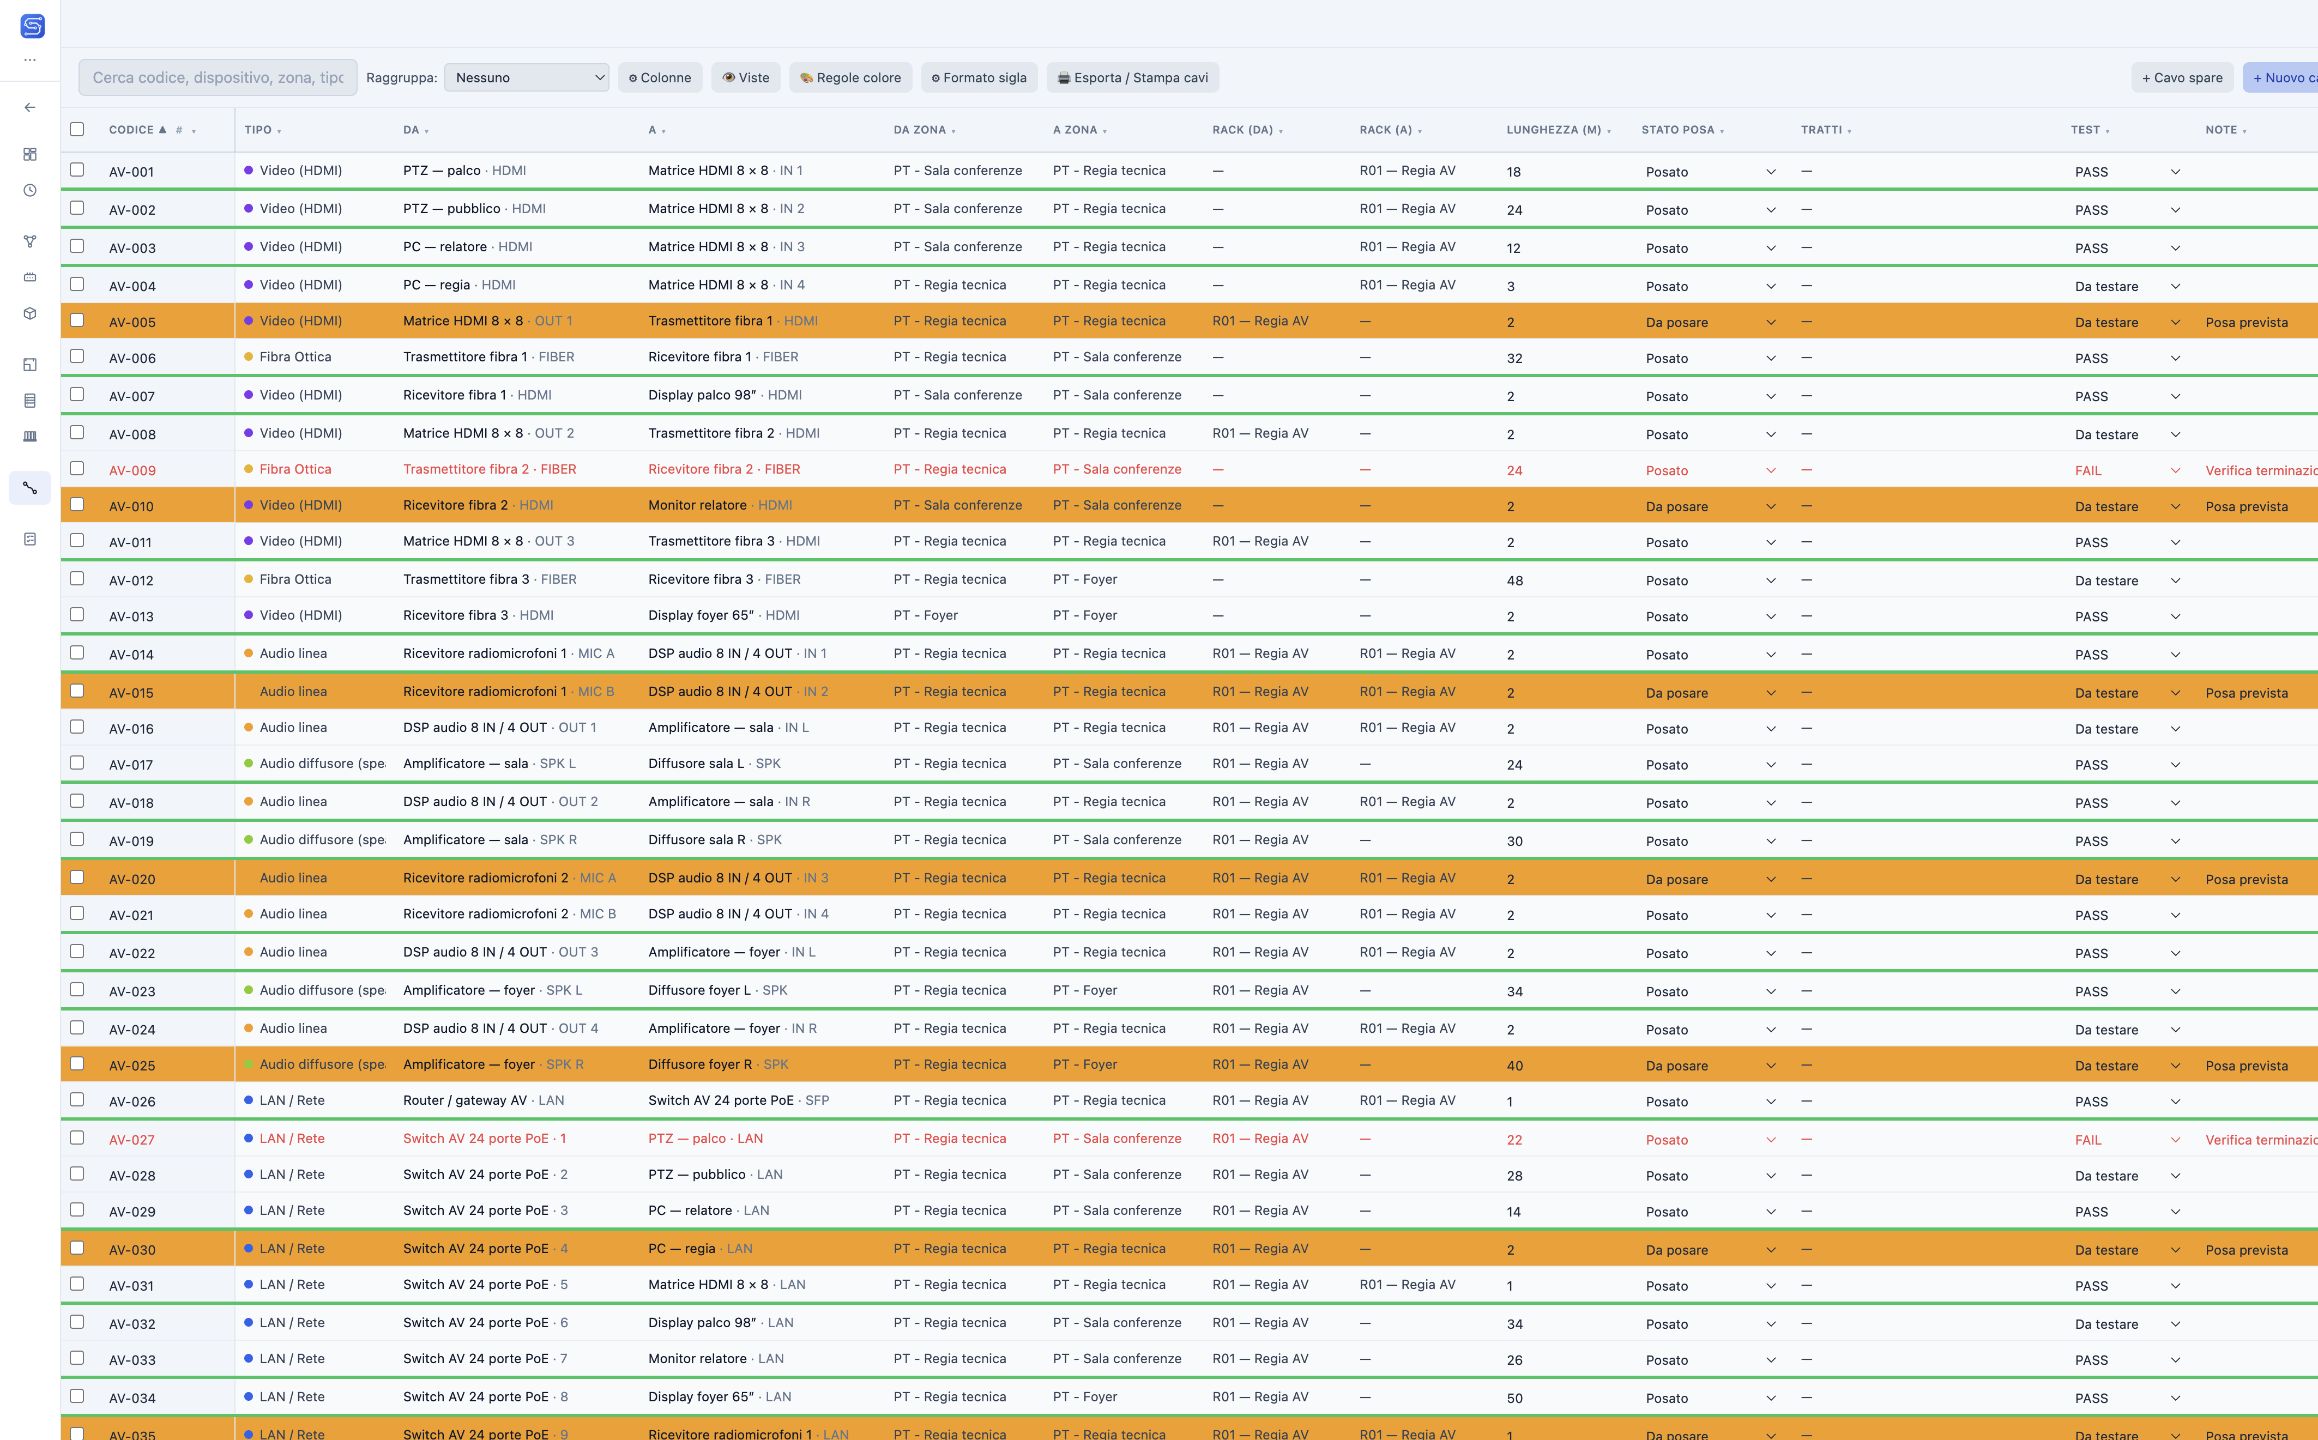
CABLE SCHEDULE

A cable schedule that works on site.

Organise cable sources, destinations, identifiers, lengths, installation, termination and tests. Create saved views and colour rules with Skemy.

Cable Schedule
Cable Schedule: dark theme
Cable Schedule: light theme
LIGHTDARK
Actual screenshots · Conference centre demo · Drag the divider · App shown in Italian

What belongs in a cable schedule

A cable schedule contains the information needed to identify and track each connection. In Skemy, review cable identifiers, signal types, source and destination devices and ports, zones, racks and lengths. The data belongs to the project, so the schematic and schedule describe the same system.

Colour rules that make priorities visible

In the demo, red text flags a failed test, an orange fill marks pending installation and a green underline shows a passed test. Rules are evaluated in order: the first enabled rule matching the row is applied. Textual statuses remain available alongside the visual cues.

Installation, termination and testing

Record work status and keep notes and lengths available. Lengths estimated from physical routes support planning and should be distinguished from recorded measurements. Export or print the schedule to support installation and handover.

Explore Cable Schedule →
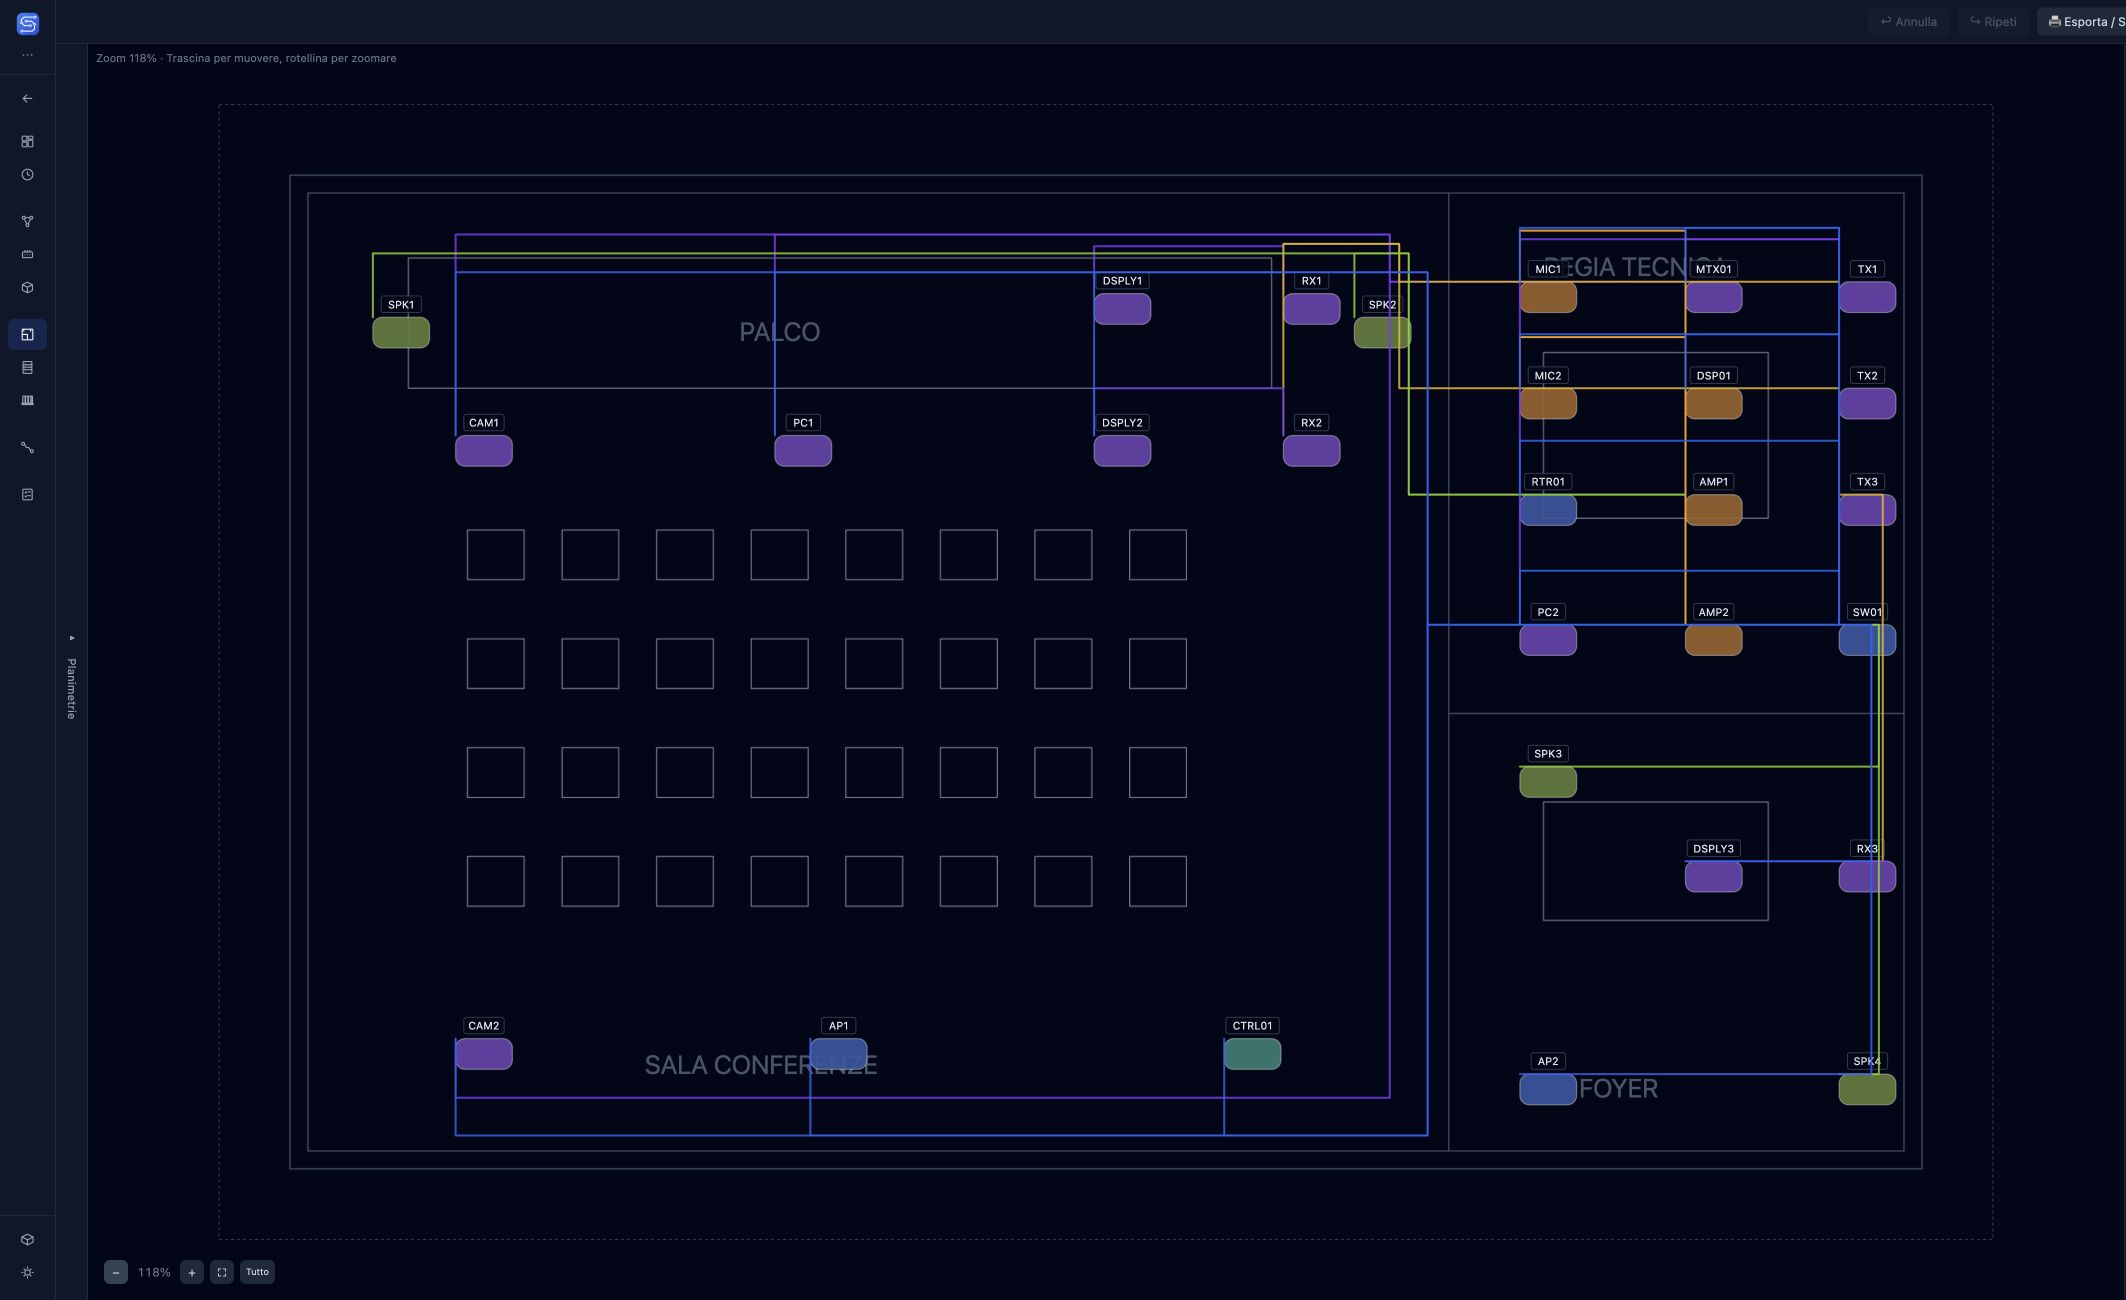
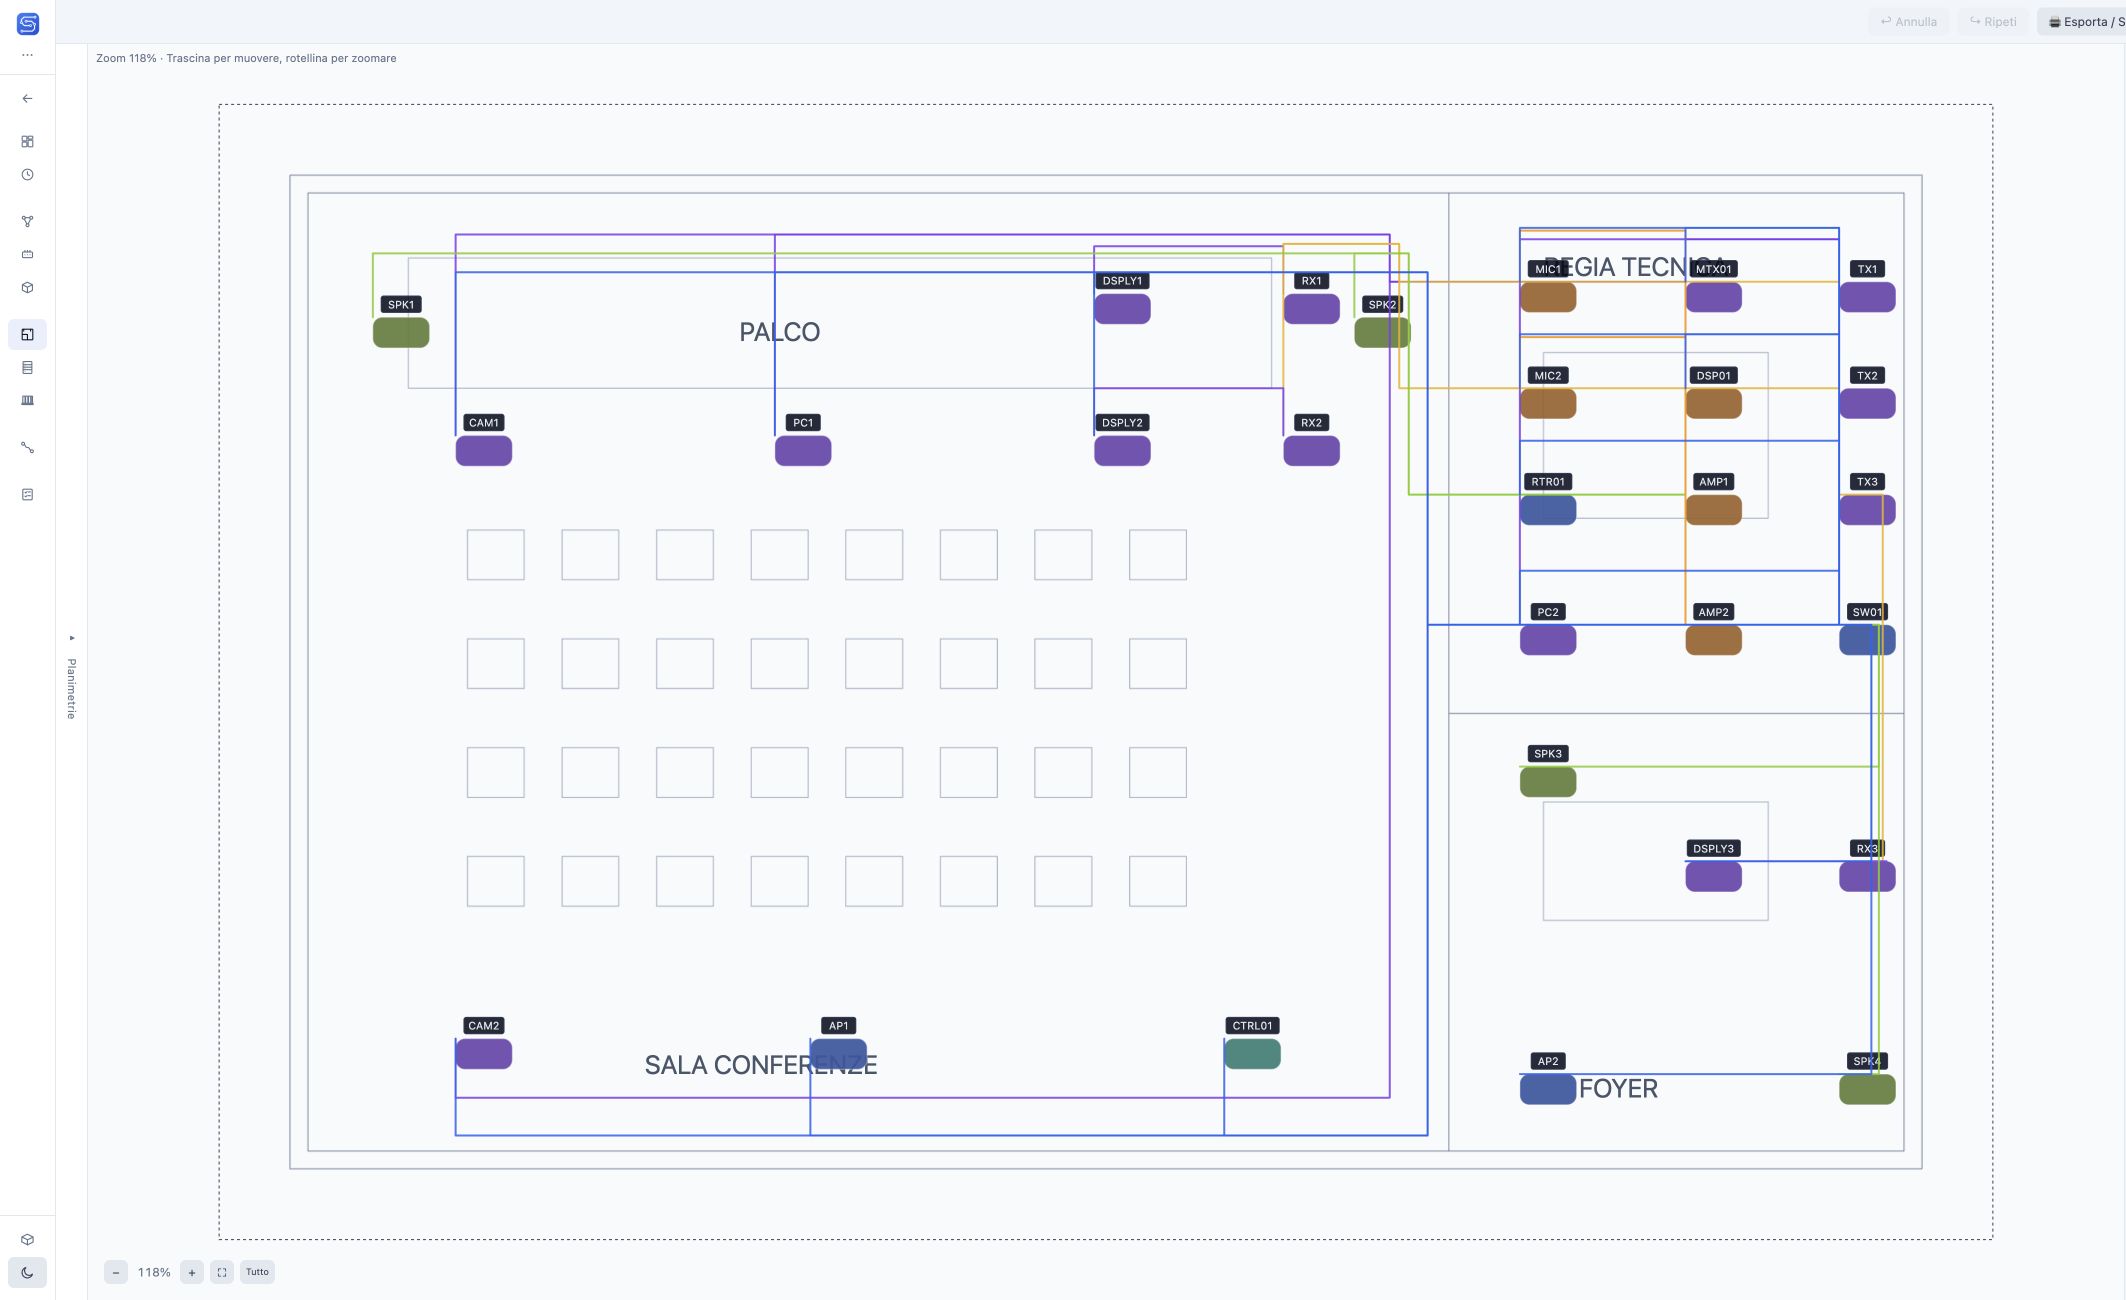
DEVICE LAYOUT

Place devices and cables on the floor plan.

Place devices on floor plans, import DWG, DXF, PDF and images, calibrate scale and organise cable routes, floors and zones with Skemy.

Device Layout
Device Layout: dark theme
Device Layout: light theme
LIGHTDARK
Actual screenshots · Conference centre demo · Drag the divider · App shown in Italian

A physical view of the system

Device Layout connects project logic to installation spaces. Place devices on the floor plan and organise work by floors and zones. Physical positions are separate from the System Schematic arrangement, so you can keep the schematic readable while representing the spaces.

Calibrate before measuring

Crop the useful area and calibrate the scale with a known distance. Check proportions and imported layers before measuring: compatibility depends on the source file contents. A calibrated floor plan provides a basis for placing devices and assessing distances.

Follow physical cable routes

Draw cable routes, shared pathways and junctions between floors. In the demo, connections follow orthogonal segments around the perimeter, leaving the seating area clear. Estimated lengths support planning but do not replace on-site checks.

Explore Device Layout →
YOUR PROJECT, WITHIN REACH

Change your perspective.
Keep the same project.

From switch ports to the rack, from the equipment schedule to commissioning: each view answers a practical question.

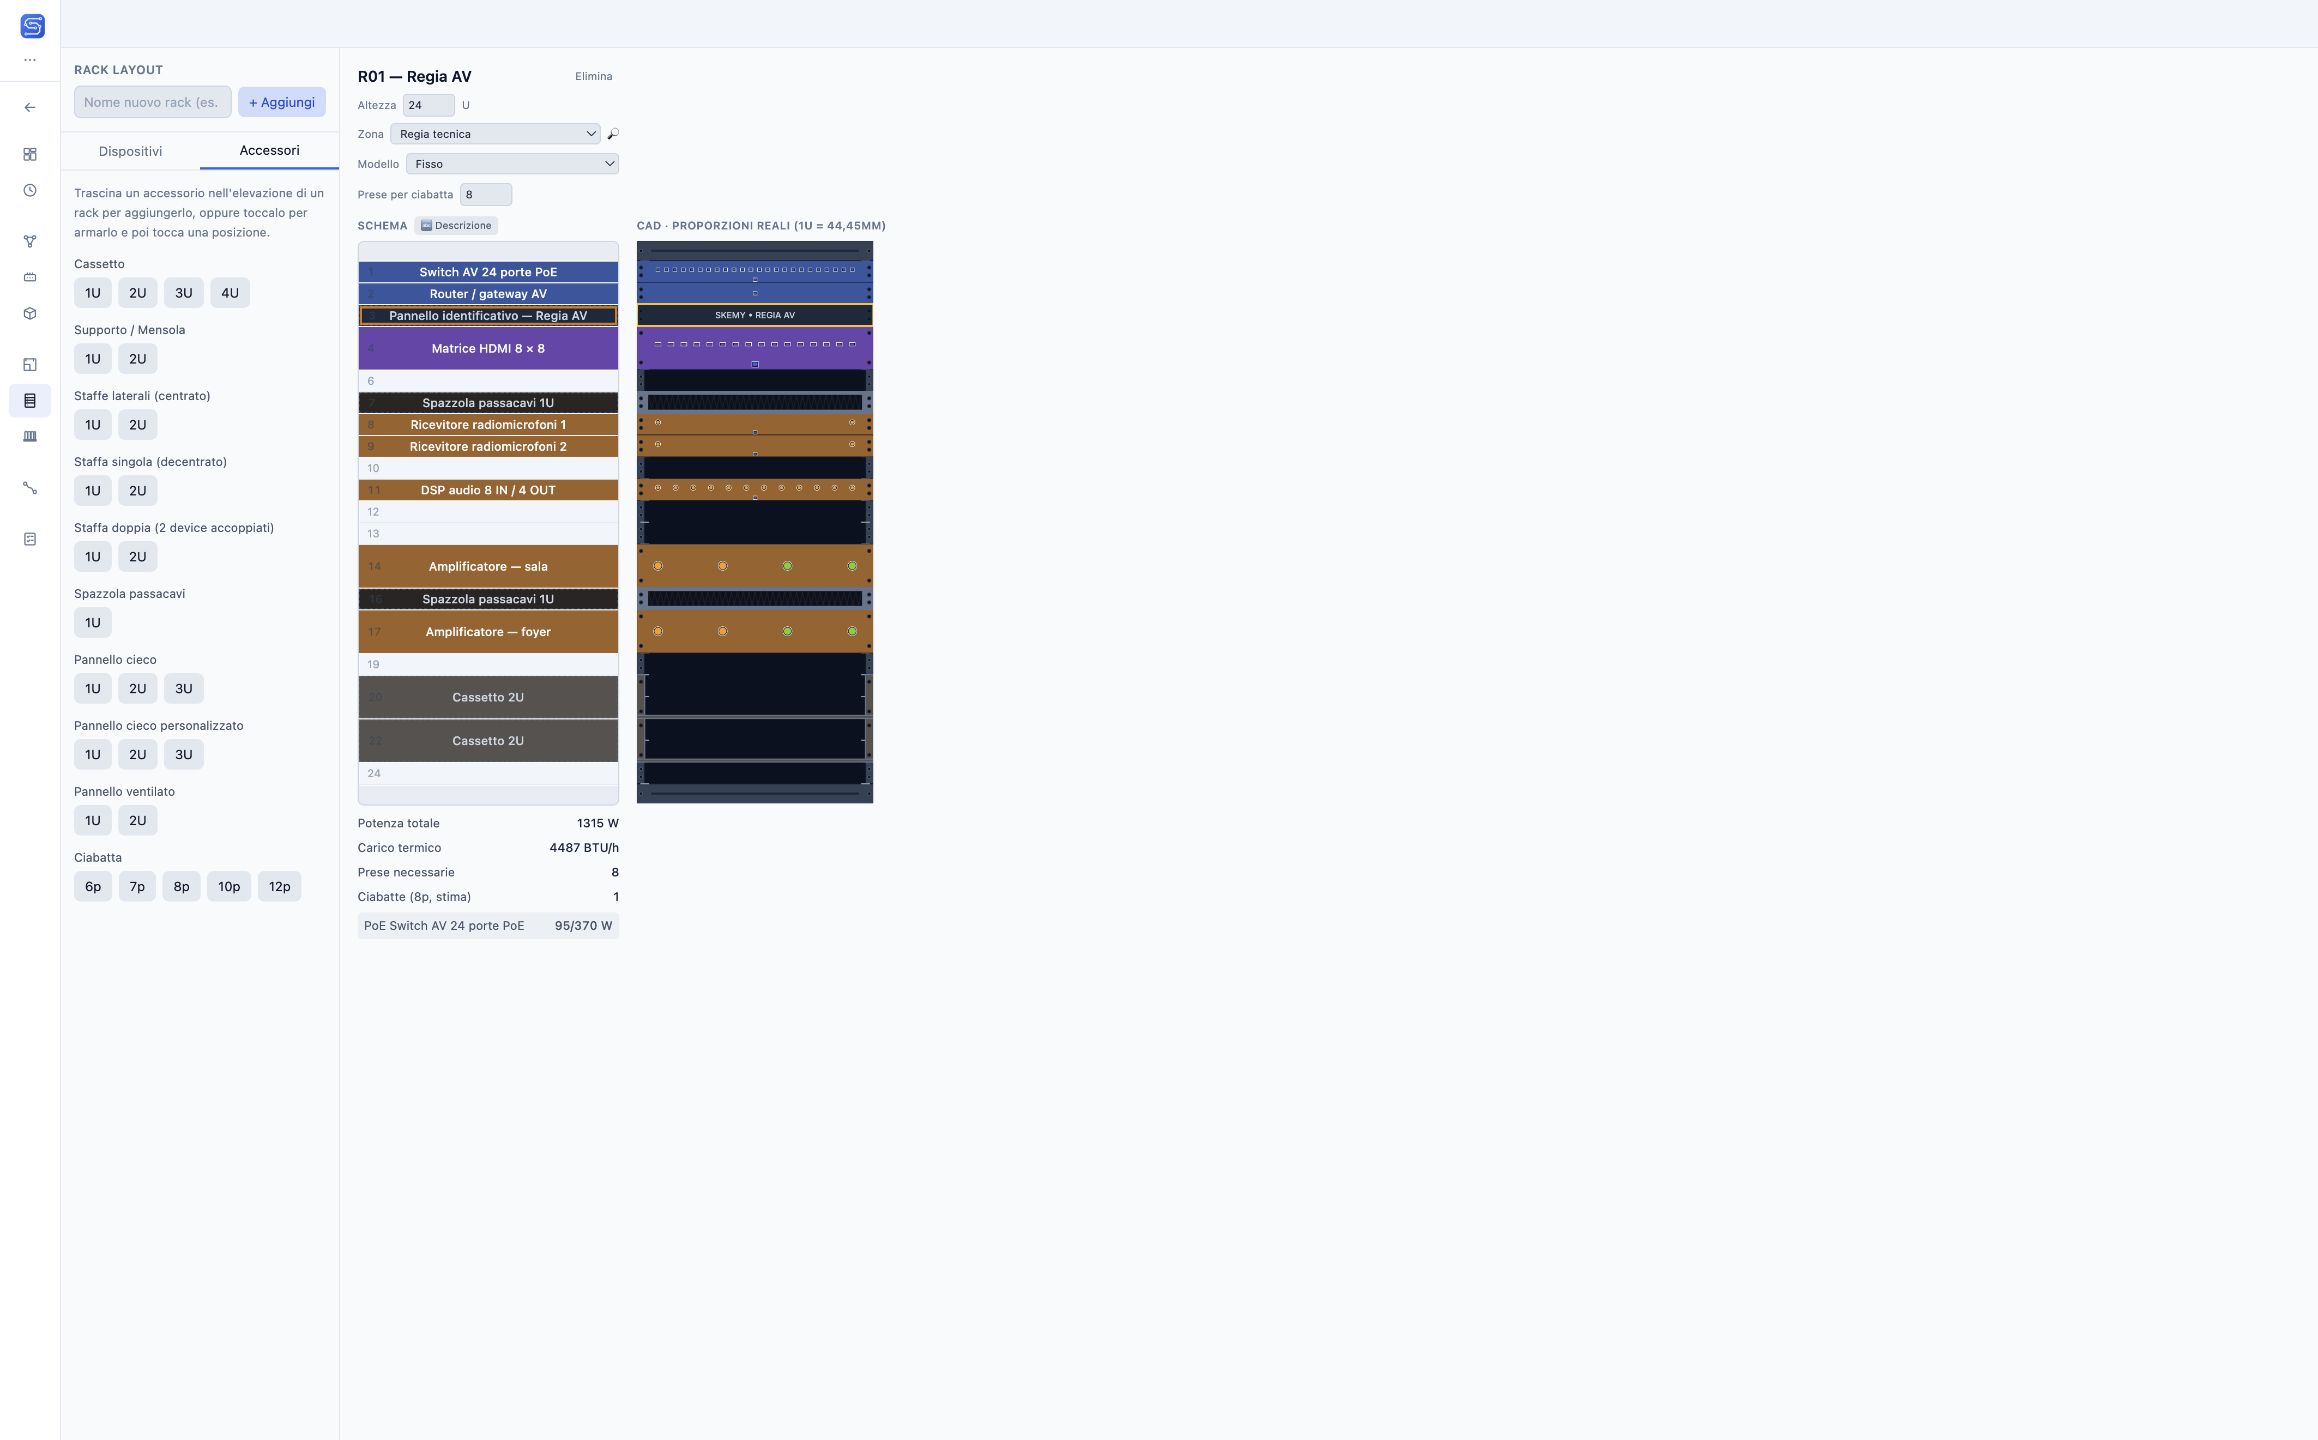
Plan the rack before you build it.

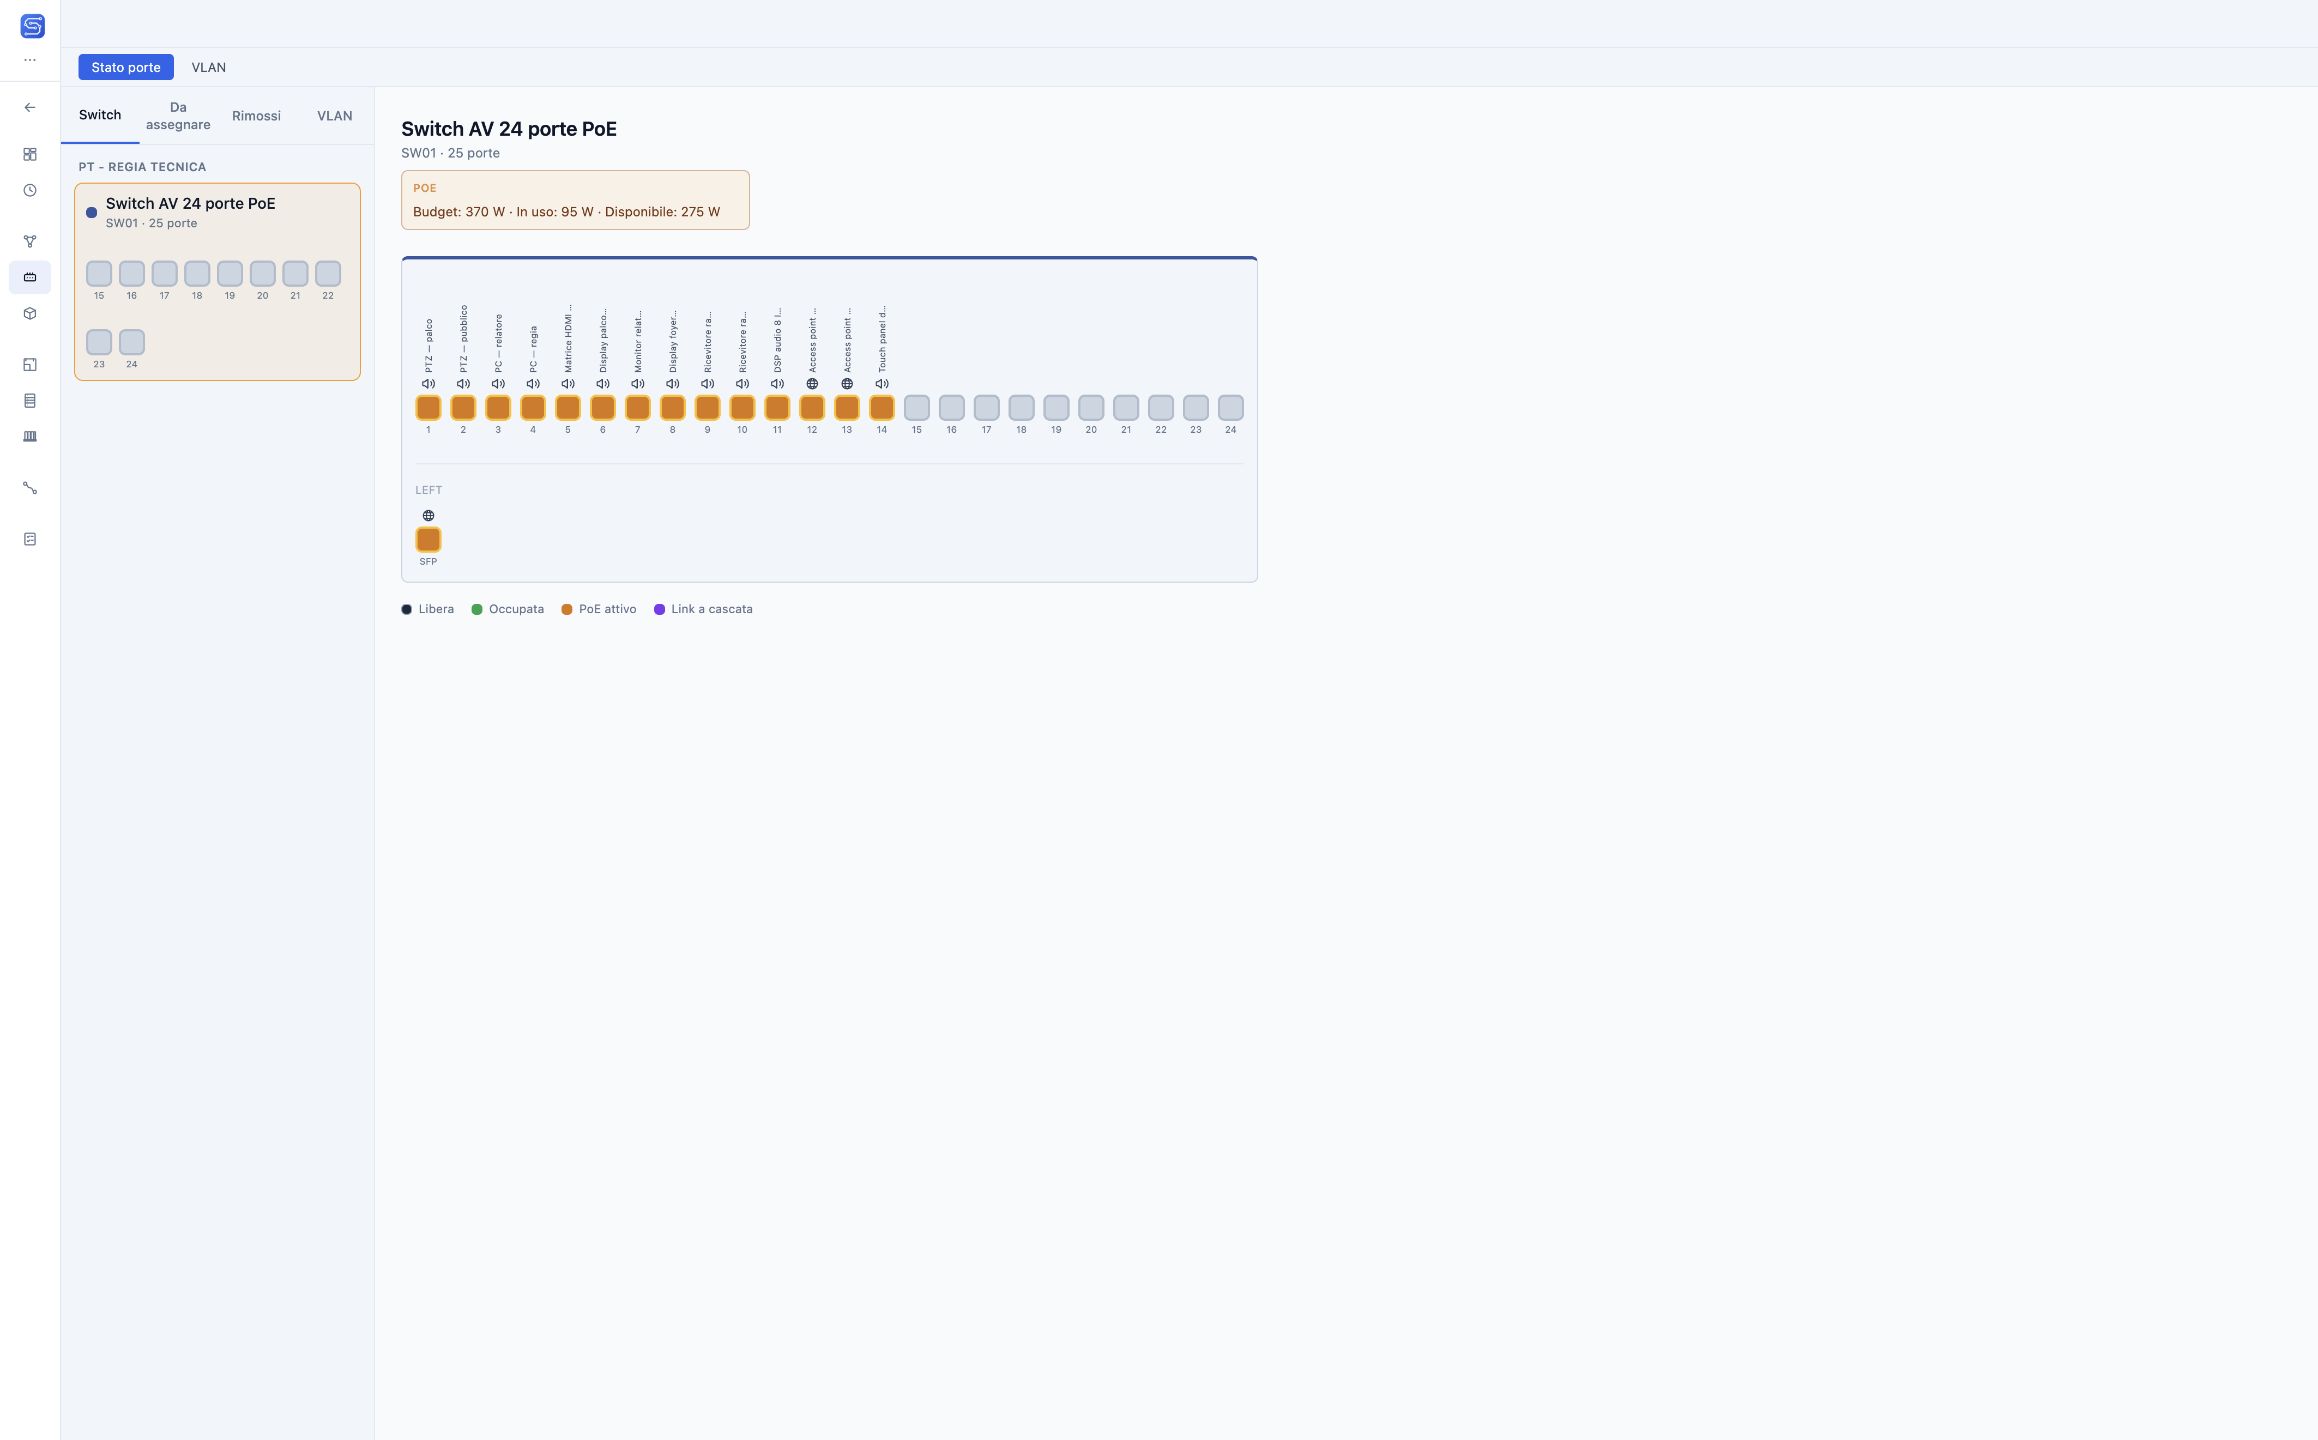
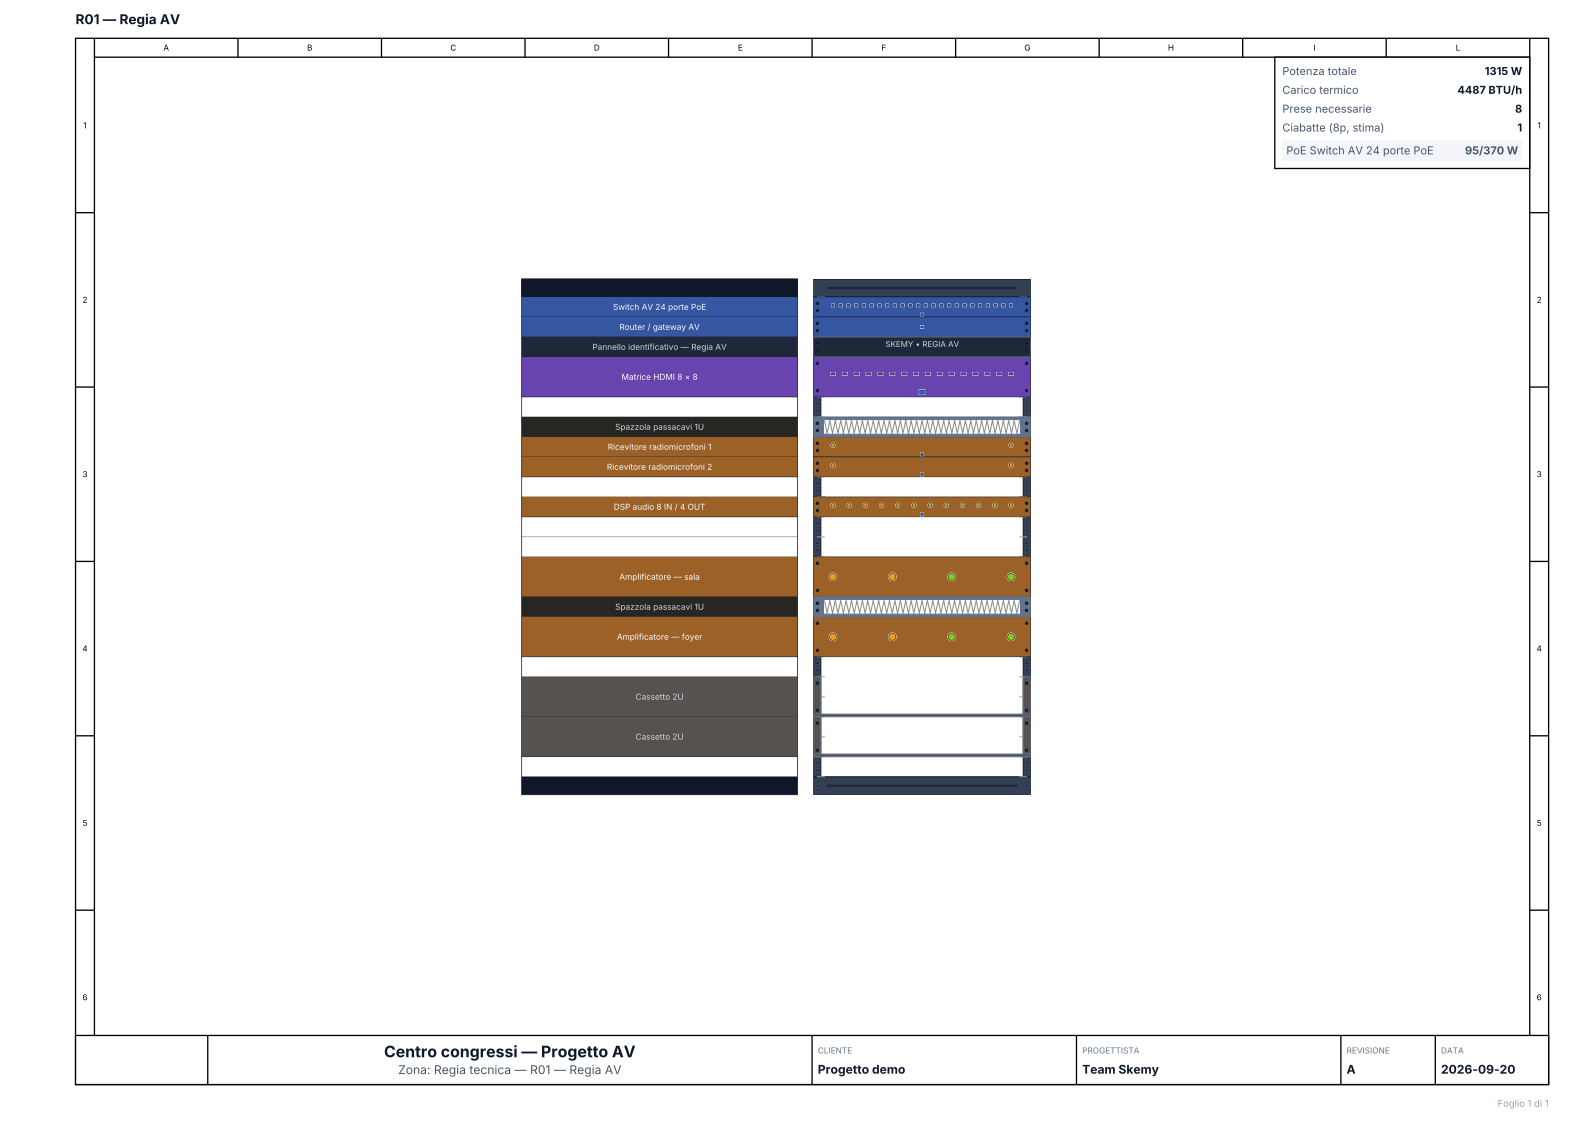
Arrange equipment in rack units and switch between schematic and proportioned CAD views. Add custom blanking panels, cable brushes and drawers. Review space usage, power, heat load, outlets and PoE budget.

Rack Layout
Rack Layout: dark theme
Rack Layout: light theme
LIGHTDARK
Actual screenshots · Conference centre demo · Drag the divider · App shown in Italian
ELECTRICAL PANEL LAYOUT

Electrical panels belong in the project too.

Organise devices on DIN rails and prepare electrical panel layouts alongside the other system views.

PROJECT OVERVIEW

One place to review your work.

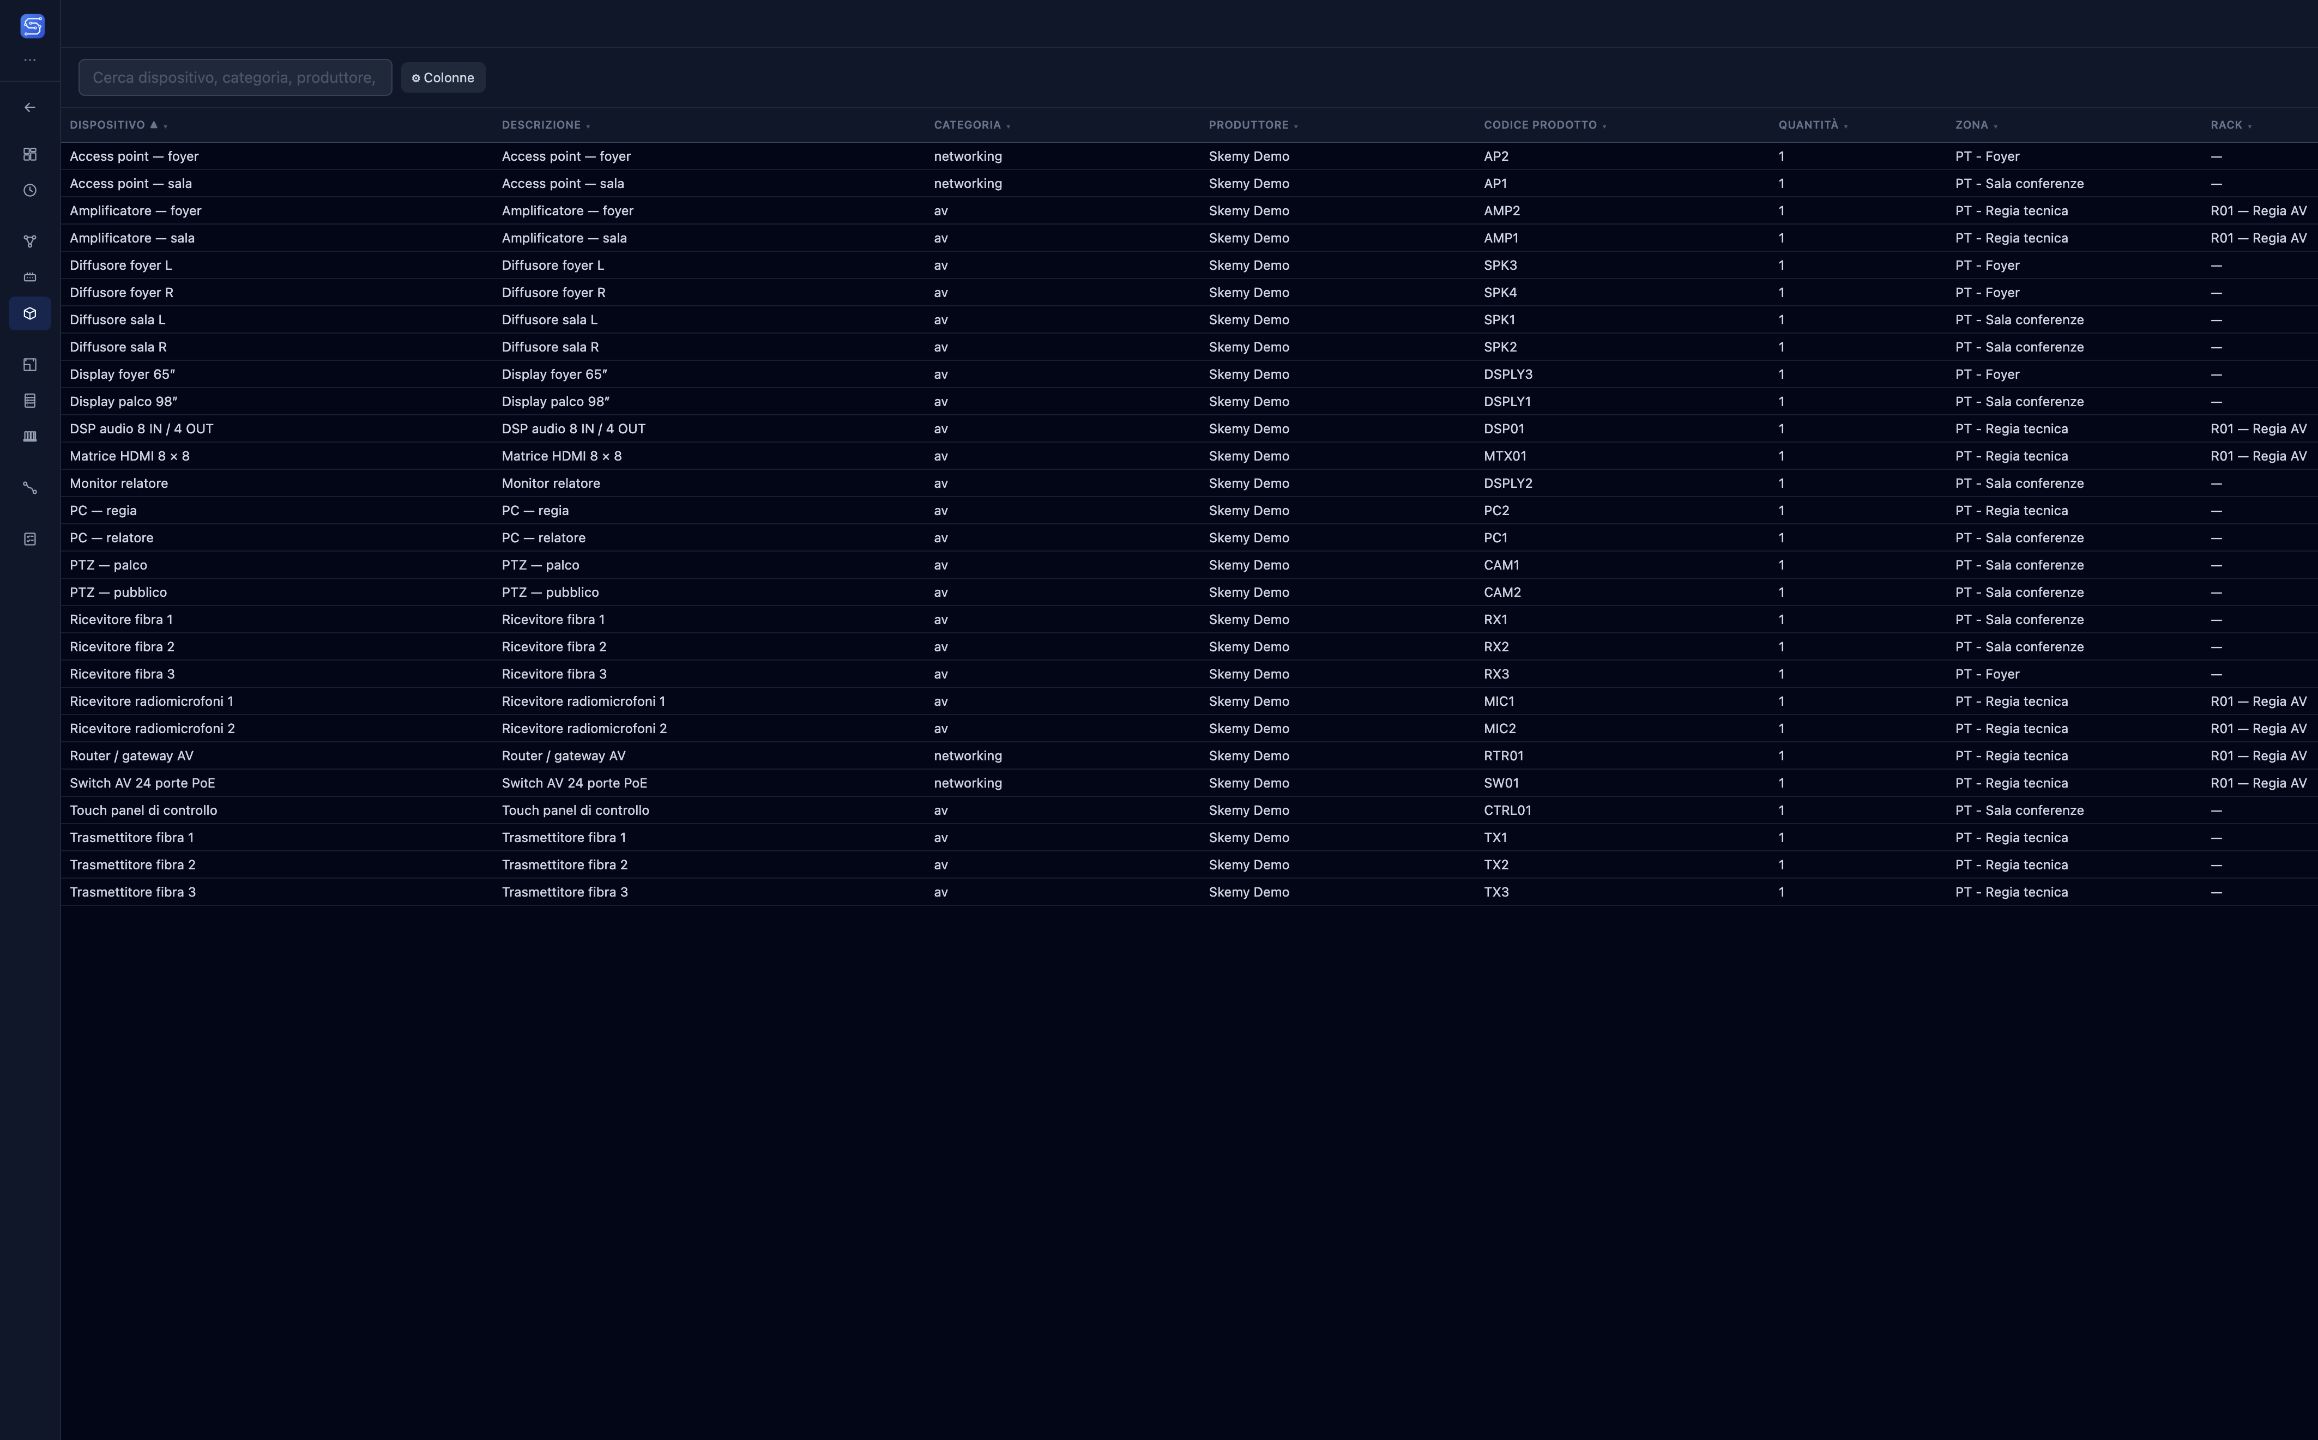
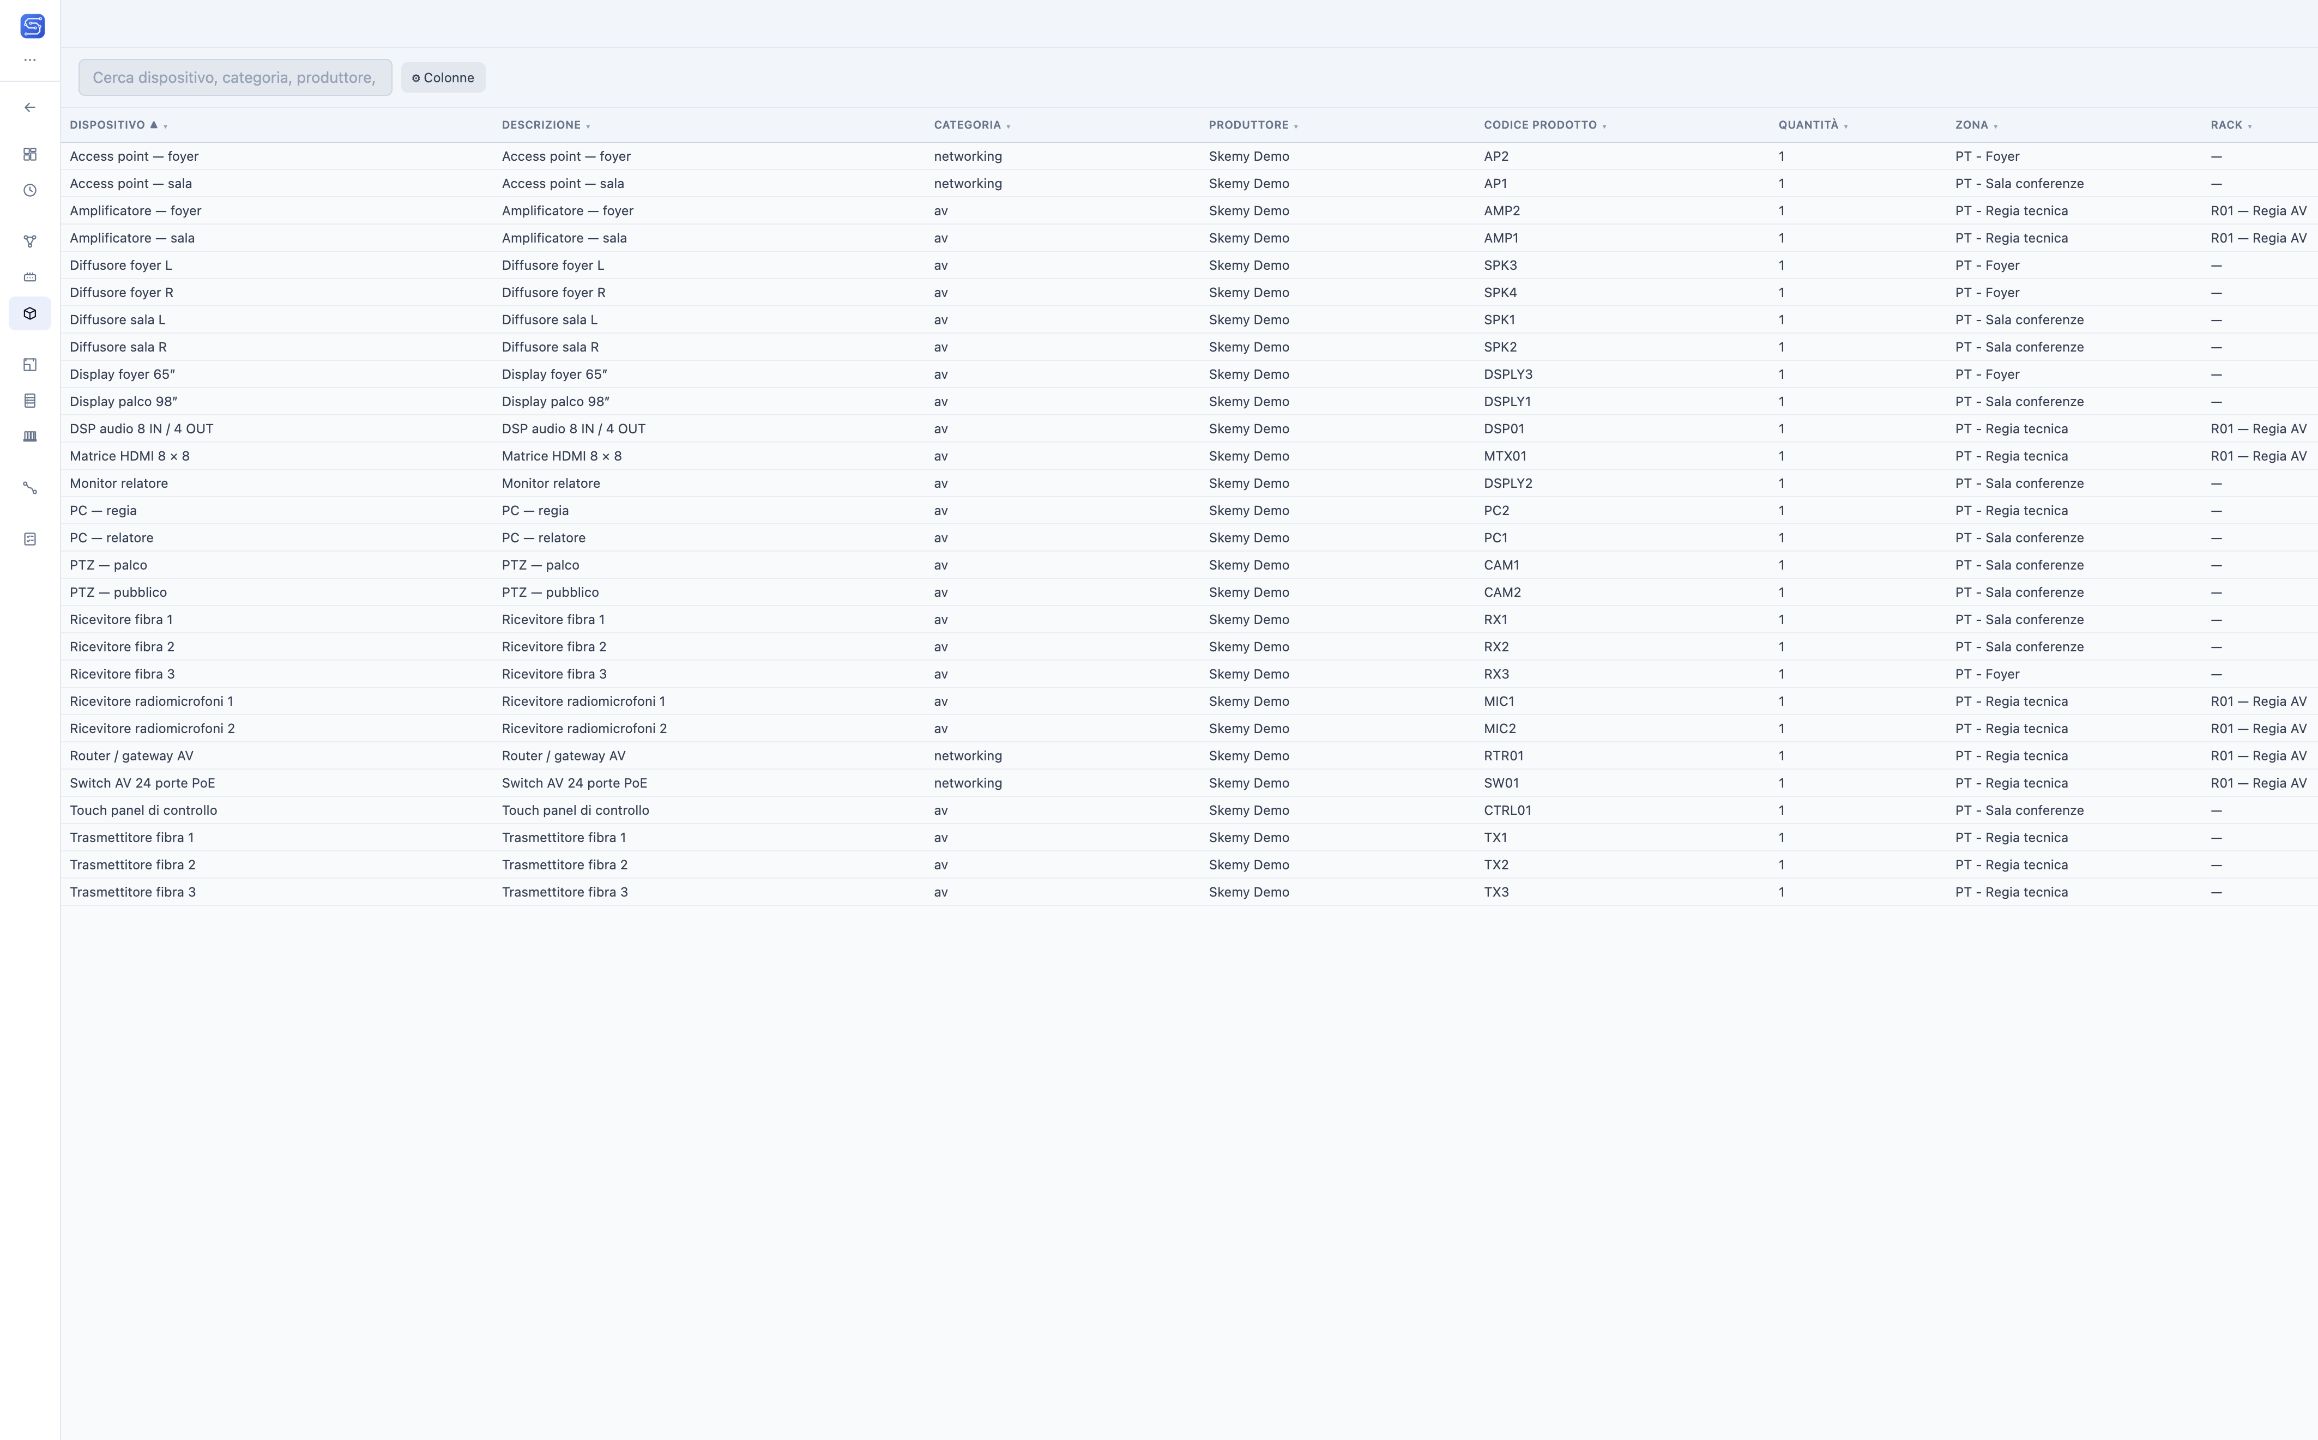
Review devices, cables, floor plans, rack assignments and project integrity. Keep title block data together with floor and zone organisation.

OPTIMISED FOR TABLETS. BUILT FOR TEAMS.

Design in the office.
Contribute from the site.

Share projects through organisations and assign team roles. Designers, managers and technicians work from a shared reference.

Share the project context.

Bring your team and organisation projects together. Roles define who can manage, edit or view the work.

Take the project with you.

Review schematics, cables and layouts on a tablet. The Technician role can propose changes to installation status, connections and rack positions.

Review. Then approve.

Proposals remain pending until an authorised person approves or rejects them. Approved changes become part of the project.

An interface optimised for tablets and touch: review the project beside the installation and use alternatives to dragging when placing or connecting items.

ONE WORKFLOW, START TO FINISH

Fewer steps.
A clearer overview.

01

Set up the project

Define project data, floors and zones. Start a new project or import a quotation from Excel.

02

Build the system

Add devices, organise connections and prepare installation layouts.

03

Prepare the handover

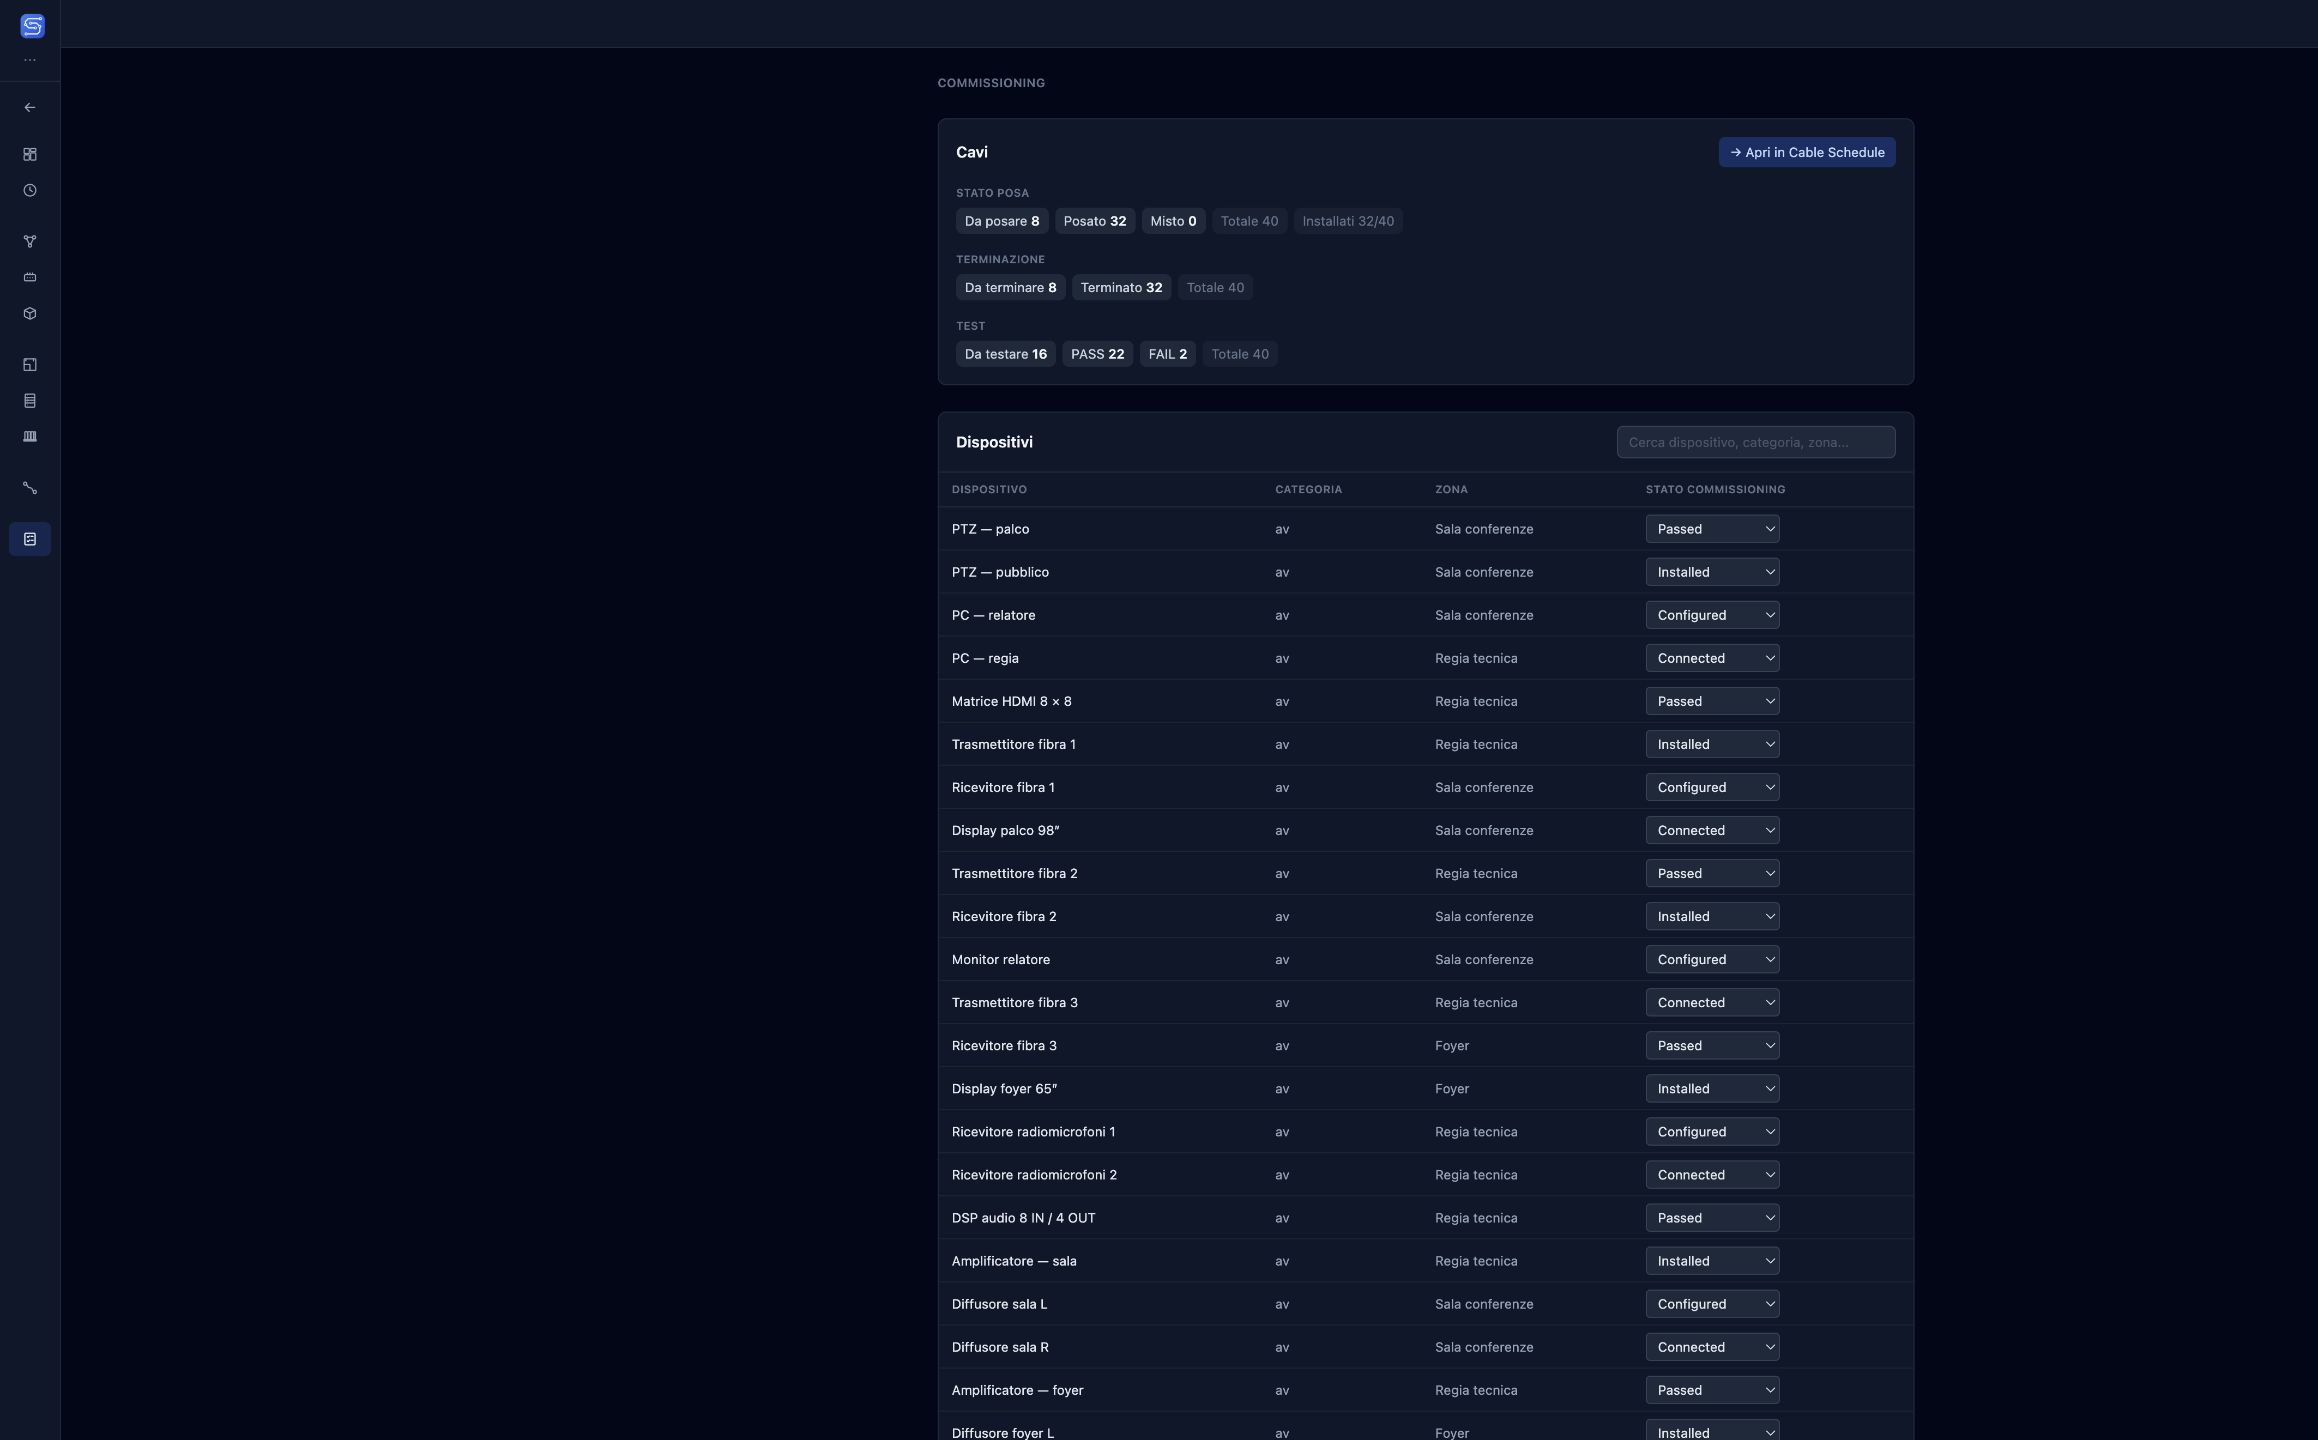
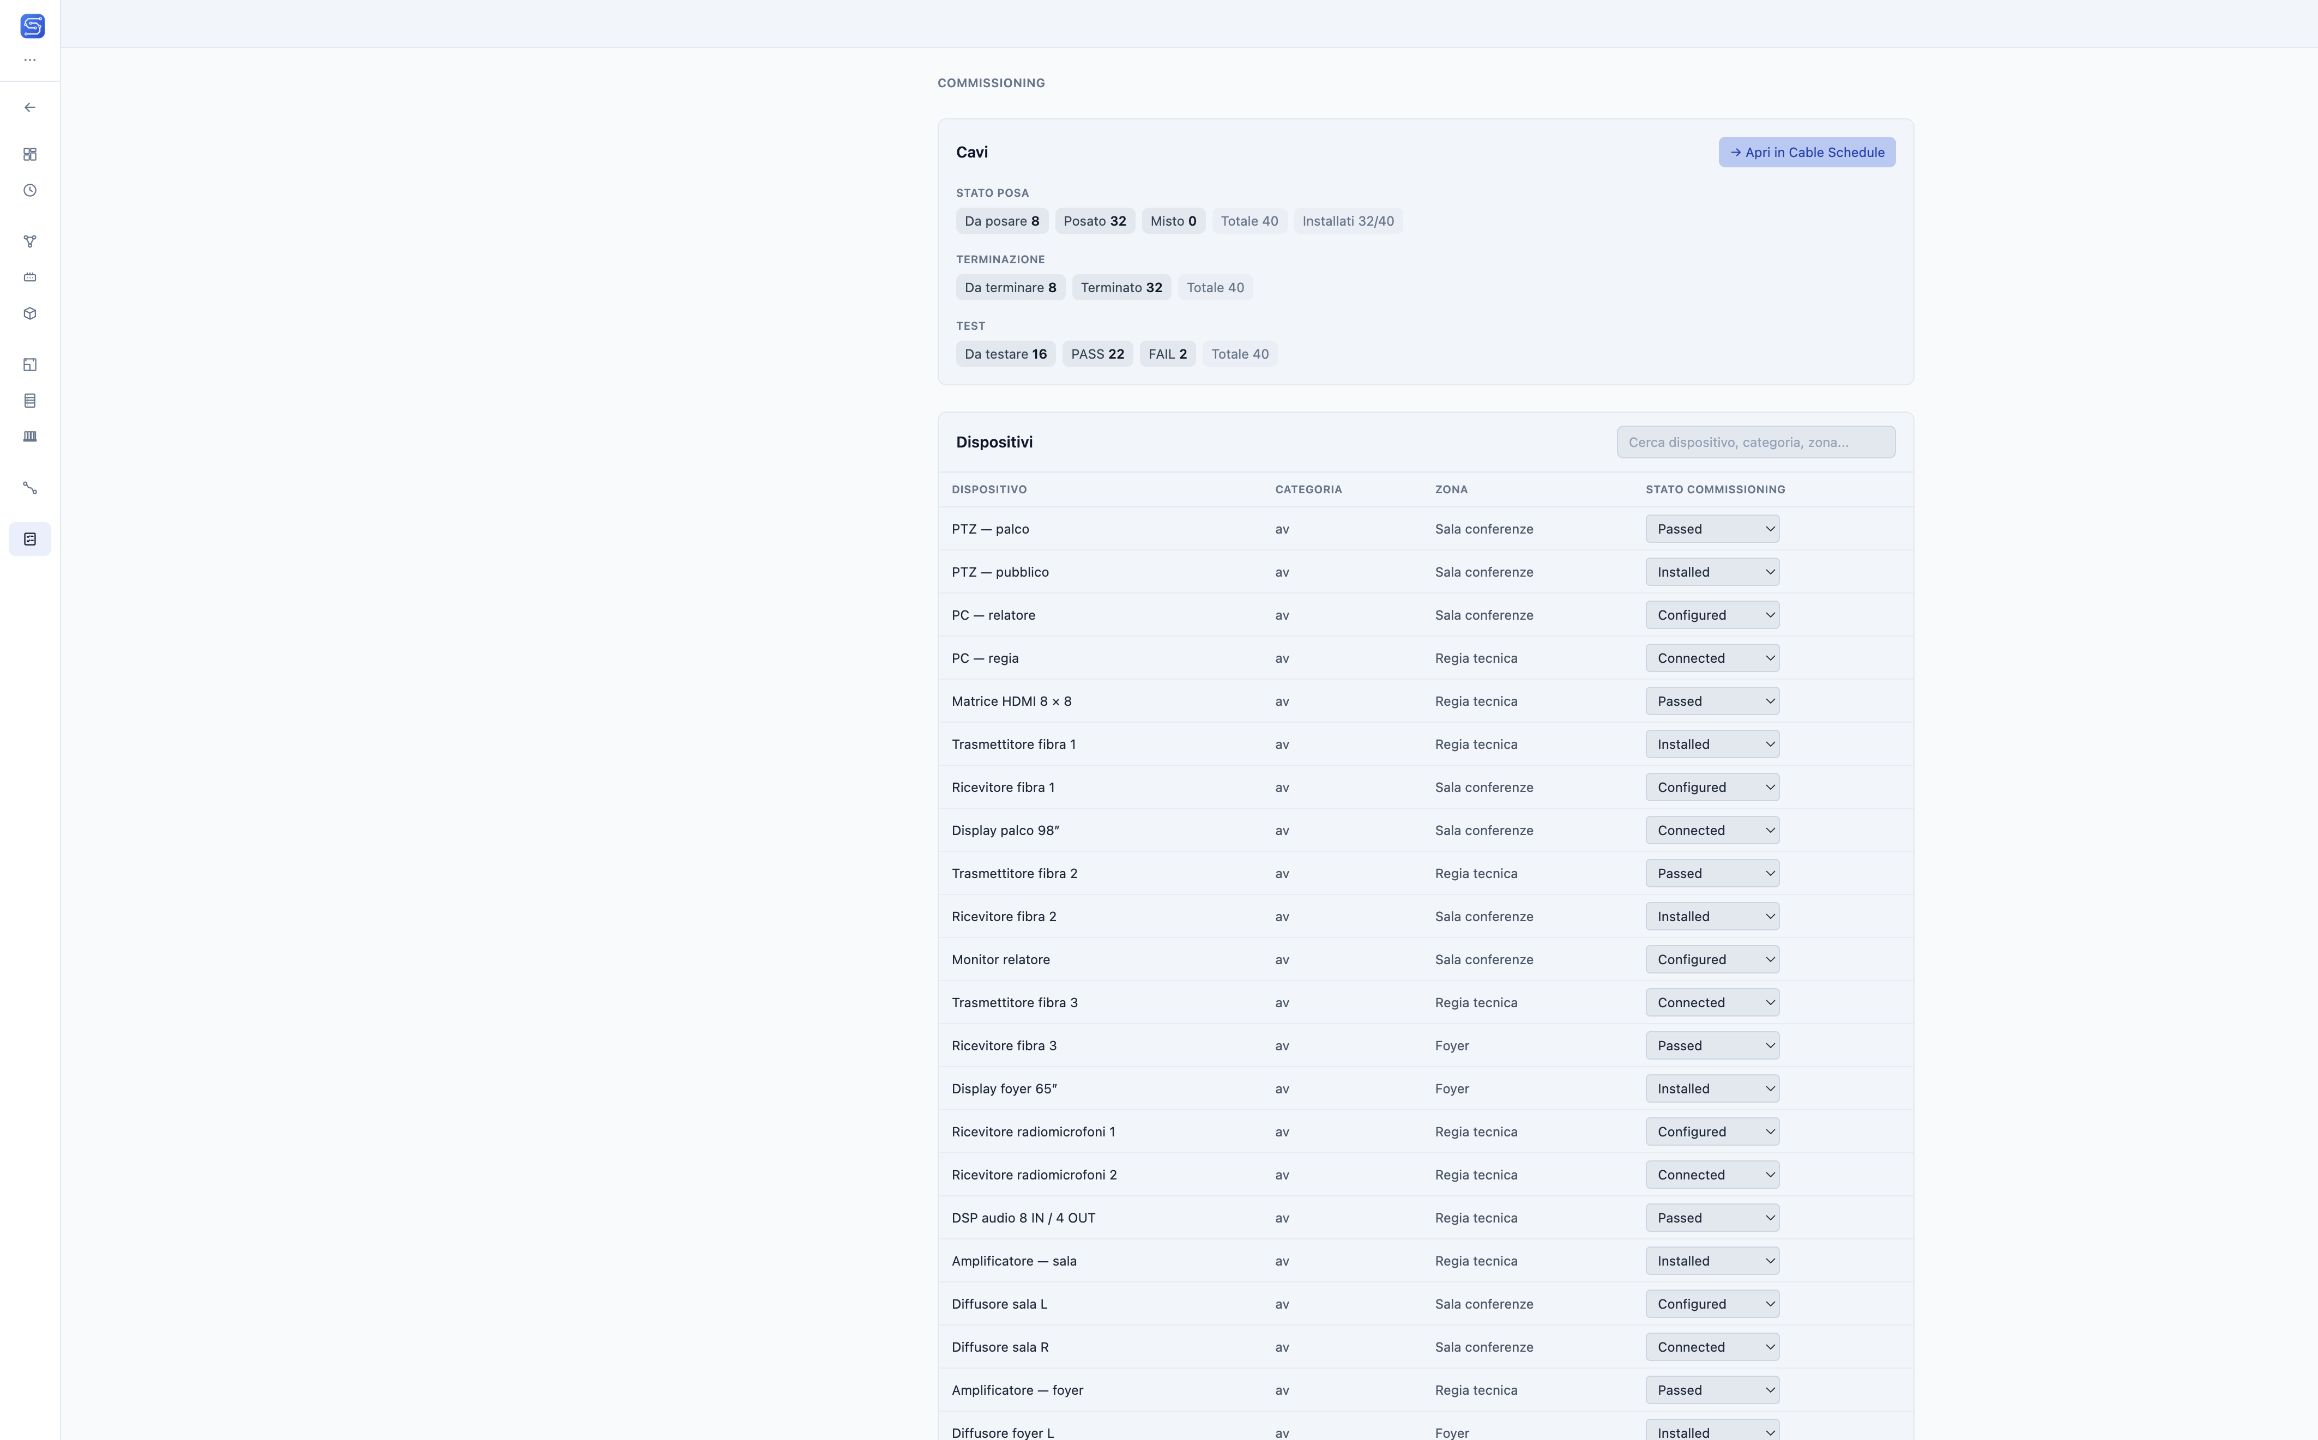
Review schedules, export or print the project, and track commissioning activities.

FROM DESIGN TO HANDOVER

Keep the detail.
Even outside Skemy.

Prepare drawings for installers and clients. The compact title block leaves room for the system, while vector lines and text stay sharp when enlarged. Embedded raster images retain their original resolution limits.

VERSION 0.99.3 RC

Download Skemy —
Release Candidate

Skemy is currently available as a preview for macOS and Windows.

PREVIEW

macOS

Universal installer for Intel and Apple Silicon Macs.

Download for macOS

Universal · Intel + Apple Silicon · DMG

Version 0.99.3 Release Candidate · Checksum SHA-256

A FEW MORE DETAILS

Before you start.

Who is Skemy for?

Designers, installers and systems integrators who want to organise schematics, devices, connections and documentation in one workspace.

Can I use my own devices?

Start with the library or create custom devices. You can also import and export library backups.

Can I import an existing project?

Skemy supports JSON project imports and can build a new project from an Excel quotation or bill of materials.

Can I choose the interface theme?

Yes. Choose light or dark mode in preferences. Use the dividers on this page to compare both themes on the same demo project.

How does a technician contribute?

The Technician role reviews a shared project and proposes operational changes to installation, connections and rack positions. An authorised manager can approve or reject them.

How are DWG files imported?

DWG files are converted in the background when the project is saved in the cloud. Once conversion finishes, the drawing is available in Device Layout. DXF, PDF, SVG and images are also supported. Check scale, layers and the imported result.

YOUR NEXT CONNECTION STARTS HERE

Your next system.
Start with Skemy.

Open Skemy ↗

From design to installation.

Project view

Drag the divider to compare themes. Press Esc or the X to return to the page.